关键要点
- 从 GitHub 中获取一个简单的 Spring Boot Java 应用程序。
- 将应用程序连接到 Azure MySQL 数据库服务。
- 在 Azure 上配置一个运行 WildFly 的 Linux VM。
- 将示例应用程序部署到 WildFly 服务器。
最近,我被要求构建一个在 WildFly 应用程序平台上运行的演示网站,并连接到微软 Azure 上的 MySQL 数据库。前提看起来似乎很简单,但实现起来可能很棘手,而且关于如何设置这样的东西的文档也很有限。我花了很多时间来研究实现这一目标需要做些什么,我将把步骤分享给大家。
请注意,我使用 Nginx 作为反向代理服务器,因为这比在 WildFly 发行版中使用 VM IP 地址要容易得多。使用 Nginx,我就能够在内部使用 http://127.0.0.1 。这样还能够在云环境中更轻松地使用集群和扩展 WildFly。
先决条件:
- 一个 Azure 帐户(此处免费试用)
- 一个Git 客户端
- Azure CLI 2.0
- Java 7 JDK 或更高版本
克隆 GitHub 示例
通过命令控制台进入到某个工作目录,并克隆示例代码库。
git clone https://github.com/bbenz/spring-boot-todo
通过命令行验证你的 Azure 帐户凭证
你需要一个 Azure 帐户来完成这些步骤。你可以在这里获得免费试用账号。要确保你已登录到自己的Azure 帐户,然后输入az account list。如果你尚未登录,请输入az login,然后按照提示操作。
使用 Azure CLI 创建 Azure MySQL 数据库
接下来,让我们使用 Azure CLI 创建一个 Azure MySQL 数据库。我们将在命令行窗口中使用 Azure CLI 2.0 来创建资源组和 MySQL 实例。
Azure 命令行界面(CLI)是在 Mac、Linux 和 Windows 的命令行中操作 Azure 的得力助手。它兼容 POSIX,使用 Python 编写,并在GitHub 上开源。CLI 可以在Mac 和Linux 上的命令行窗口内运行,在Windows 上,你可以通过命令提示符或Windows 的Linux 子系统(也就是 Windows 上的 Bash )来访问 CLI。甚至还有适用于IOS 和Android 的CLI 应用程序。
你还可以通过浏览器访问 azure portal 或 shell.azure.com 来使用 Azure CLI。你可以在此处找到有关 shell 的更多信息,以及合作伙伴的 CLI 的信息。请注意,所有这些都需要一个微软 Azure 帐户(此处可以申请免费试用)。
登录并创建资源组
使用 az login 命令登录 Azure,然后按照屏幕上的说明进行操作。
创建 Azure 资源组
Azure 资源组将 Azure 服务作为单位进行管理。每个资源组都必须对应一个位置。要查看`--location`的所有可能值,请使用 az appservice list-locations 命令。
以下示例在北欧地区创建了一个 Azure 资源组。
az group create --name myResourceGroup --location “North Europe”
创建一个 MySQL 服务器
在 Azure 中创建 MySQL 服务器。将下面命令中的`<mysql_server_name>`占位符换成你自己的 MySQL 服务器名称。这个名称是你的 MySQL 服务器的主机名“<mysql_server_name> .mysql.database.azure.com”的一部分,因此它必须是全局唯一的。也可以用自己的值替换`<admin_user>`和`<admin_password>`:
az mysql server create --name <mysql_server_name> --resource-group myResourceGroup --location "North Europe" --admin-user <admin_user> --admin-password <admin_password>
配置 MySQL 防火墙
使用 az mysql server firewall-rule create 命令为 MySQL 服务器创建防火墙规则。下面是为一个 IP 地址范围创建防火墙规则的示例(你可能希望缩小实际的防火墙 IP 地址范围):
az mysql server firewall-rule create --name allIPs --server <mysql_server_name> --resource-group myResourceGroup --start-ip-address 0.0.0.0 --end-ip-address 255.255.255.255
配置 Azure MySQL 数据库
使用之前为“<admin_user>”和“<mysql_server_name>”指定的值连接到 MySQL 服务器。
mysql -u <admin_user>@<mysql_server_name> -h <mysql_server_name>.mysql.database.azure.com -P 3306 -p
在`mysql`提示符下,创建数据库和表。
CREATE DATABASE tododb;
创建一个数据库用户,并在`tododb`数据库中赋予它所有权限。用你自己唯一的应用程序名称替换占位符`<Javaapp_user>`和`<Javaapp_password>`:
CREATE USER '<Javaapp_user>' IDENTIFIED BY '<Javaapp_password>';
GRANT ALL PRIVILEGES ON tododb.* TO '<Javaapp_user>';
键入`quit`退出服务器连接。
更新 application.properties 文件中的值
更新 src/main/resources/application.properties 中的以下几个值:
spring.datasource.url=jdbc:mysql://@<mysql_server_name>.mysql.database.azure.com:3306/tododb
spring.datasource.username=adminname@<mysql_server_name>
spring.datasource.password=password
spring.datasource.driver-class-name=com.mysql.jdbc.Driver
spring.jpa.hibernate.ddl-auto=update
构建并运行示例
使用代码库中的 Maven 包装器在本地构建和运行示例:
mvn package spring-boot:run
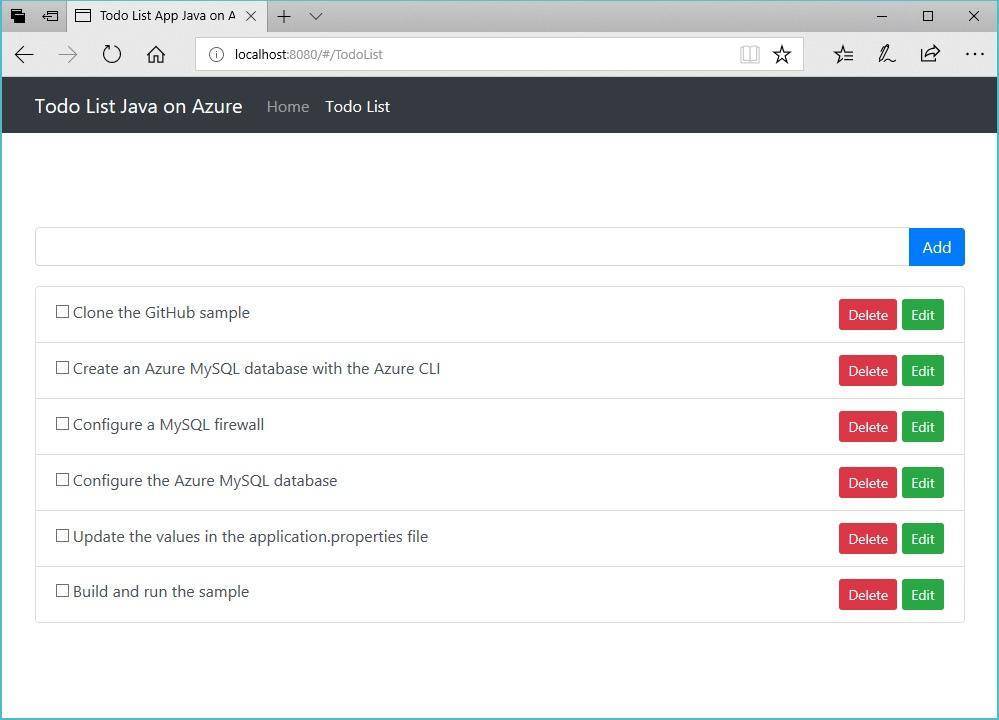
在浏览器中,打开 http://localhost:8080 ,确保在我们将程序包发送到 Azure 上的 VM 之前应用程序可以正常运行。
配置 Maven 以生成.WAR 文件
要将应用程序部署到 vm,我们需要使用 mvn package 命令来部署.war 文件。maven 已经生成了一个.jar 文件,我们需要将一个.WAR 文件部署到 Firefly。只需将这一行添加到 pom.xml 中:
<packaging>war</packaging>
现在,在与 pom.xml 相同的位置运行 mvn clean package,在目标目录中生成名为 todo-app-java-on-azure-1.0-SNAPSHOT.war 的.WAR 文件。
在 Azure 上创建 Linux VM
有几种方法可以在 Azure 上创建新的 Linux VM,在本文中,我们将使用命令行,使用 az vm create 命令。
这个命令会创建一个 Linux VM,其中包含 azure 上可用的最新 Ubuntu 镜像:
az vm create -n <vm name> -g <resource group> -l eastus2 --generate-ssh-key --image ubuntults
打开端口 8080 和 9990
接下来,在目标 VM 上打开端口 8080 和 9990。Spring Boot 将端口 8080 用于应用程序,Wildfly 使用端口 9990 进行管理访问。当你在 VM 上打开多个端口时必须设置优先级,因此将 Wildfly 的端口(我使用 800)设置为比 Spring(保留默认值 100)低。优先级范围可以从 100 到 4096。
az vm open-port -n <vm name> -g <resource group>  --port 8080
az vm open-port -n <vm name> -g <resource group>  --port 9990 --priority 800
SSH 到虚拟机
使用 az vm create 命令生成的 SSH 密钥连接到 VM。使用你的 VM 用户名替换 <username>,默认是帐号电子邮件 @左边的部分。
ssh <username>@<PublicIpAddress>
然后你会收到下面的提示,输入 yes。
The authenticity of host '< PublicIpAddress> (< PublicIpAddress>)' can't be established.
ECDSA key fingerprint is …………
Are you sure you want to continue connecting (yes/no)? yes
Warning: Permanently added < PublicIpAddress> (ECDSA) to the list of known hosts.
准备 VM
更新并安装 OpenJDK 和 nginx
现在,我们在虚拟机中,让我们确保我们拥有最新的 Linux,然后安装我们需要的软件。我们使用 nginx 作为反向代理,并配置 Wildfly,将其作为服务运行。我们还需要 Java,因此我们需要安装 OpenJDK 8。
使用 nginx 意味着 Wildfly 服务器可以使用默认值(127.0.0.1)在任何 VM 上运行。否则,我们必须使用 VM 的公共 IP 地址。在集群或容器化的环境中,如果不使用 nginx,Wildfly 就会变得不灵活。在演示环境,我们可以跳过一些配置步骤(这些已经足够了)。
apt-get update
apt-get install -y openjdk-8*
apt-get install nginx
安装 Wildfly,并将其设置为服务
接下来,让我们安装并配置 Wildfly。Wildfly 不能通过 apt-get 安装,所以我们需要使用 wget 从服务器中下载。
wget http://download.jboss.org/wildfly/12.0.0.Final/wildfly-12.0.0.Final.tar.gz
mv wildfly-12.0.0.Final.tar.gz /opt/
cd /opt/
tar -zvxf wildfly-12.0.0.Final.tar.gz
mv wildfly-12.0.0.Final wildfly
现在我们有了 Wildfly,接下来需要添加一个管理用户来处理管理任务:
cd wildfly/bin
./add-user.sh
以下是你将看到的提示以及我提供的答案:
What type of user do you wish to add?
 a) Management User (mgmt-users.properties)
 b) Application User (application-users.properties)
(a): a
Enter the details of the new user to add.
Using realm 'ManagementRealm' as discovered from the existing property files.
Username :
Password : !
What groups do you want this user to belong to? (Please enter a comma separated list, or leave blank for none)[  ]:
About to add user 'rhsotdemo1' for realm 'ManagementRealm'
Is this correct yes/no? yes
Is this new user going to be used for one AS process to connect to another AS process?
e.g. for a slave host controller connecting to the master or for a Remoting connection for server to server EJB calls.
yes/no? no
接下来,我们将在 Widfly 中配置一些有关 VM 的信息:
cd /opt/wildfly/bin/
vi standalone.conf
添加或编辑以下内容:
JAVA_HOME="/usr/lib/jvm/java-8-openjdk-amd64"
JBOSS_HOME="/opt/wildfly"
将 Wildfly 配置为自启动
将 Wildfly 配置为在 VM 启动(或重新启动)时自动启动,方法是添加以下文件:
vi /etc/default/wildfly
将以下这些添加到新文件中:
WILDFLY_USER="wildfly"
STARTUP_WAIT=180
SHUTDOWN_WAIT=30
WILDFLY_CONFIG=standalone.xml
WILDFLY_MODE=standalone
WILDFLY_BIND=0.0.0.0
保存文件,然后再创建一个新文件:
vi /opt/wildfly/bin/launch.sh
将下面的内容添加到新文件中:
#!/bin/sh
if [ "x$WILDFLY_HOME" = "x" ]; then
    WILDFLY_HOME=/opt/wildfly
fi
if [ "x$1" = "xdomain" ]; then
    echo 'Starting wildfly in domain mode.'
    $WILDFLY_HOME/bin/domain.sh -c $2 -b $3
else
    echo 'Starting wildfly in standalone mode.'
    $WILDFLY_HOME/bin/standalone.sh -c $2 -b $3
fi
保存该文件,并把它变成可执行文件:
chmod 755 /opt/wildfly/bin/launch.sh
接下来,创建一个 systemd 初始化文件:
vi /etc/systemd/system/wildfly.service
将下面的内容添加到新文件中:
[Unit]
Description=The wildfly Application Server
After=syslog.target network.target
Before=nginx.service
[Service]
Environment=LAUNCH_JBOSS_IN_BACKGROUND=1
EnvironmentFile=/etc/default/wildfly
User=wildfly
LimitNOFILE=102642
PIDFile=/var/run/wildfly/wildfly.pid
ExecStart=/opt/wildfly/bin/launch.sh $WILDFLY_MODE $WILDFLY_CONFIG $WILDFLY_BIND
StandardOutput=null
[Install]
WantedBy=multi-user.target
保存该文件,并设置文件和目录的所有权:
chown wildfly:wildfly -R /opt/wildfly/
systemctl enable wildfly
我们还需要禁用 nginx 监听端口 80(Wildfly 会处理这个):
vi /etc/nginx/sites-enabled/default
把下面这行注释掉:
#listen [::]:80 default_server;
接下来,我们需要创建一个新的 nginx 服务器块:
vi /etc/nginx/sites-available/wildfly
将下面的内容添加到新文件中:
upstream wildfly {
    server 127.0.0.1:8080;
}
server {
    listen      80;
    server_name your-domain.com;
    access_log  /var/log/nginx/wildfly.access.log;
    error_log   /var/log/nginx/wildfly.error.log;
    proxy_buffers 16 64k;
    proxy_buffer_size 128k;
location/{
        proxy_pass  http://wildfly;
        proxy_next_upstream error timeout invalid_header http_500 http_502 http_503 http_504;
        proxy_redirect off;
        proxy_set_header    Host            $host;
        proxy_set_header    X-Real-IP       $remote_addr;
        proxy_set_header    X-Forwarded-For $proxy_add_x_forwarded_for;
        proxy_set_header    X-Forwarded-Proto https;
    }
}
通过命令在 nginx 和 Wildfly 之间创建一个符号链接,然后启动 Wildfly 服务,并让 nginx 在 Wildfly 启动时跟着启动:
ln -s /etc/nginx/sites-available/wildfly /etc/nginx/sites-enabled/
systemctl enable nginx
systemctl start nginx.service
groupadd -r wildfly
useradd -r -g wildfly -d /opt/wildfly -s /sbin/nologin wildfly
systemctl daemon-reload
systemctl start wildfly
如果你修改了以上任何内容,请使用以下命令重新启动 nginx 和 Wildfly:
systemctl restart nginx.service
将.WAR 文件部署到 Wildfly 服务器
你现在已准备好将.WAR 文件传输到 VM。最简单的方法是使用 scp(安全拷贝)。
scp /mnt/c/GitHub/todo-app-java-on-azure/target/todo-app-java-on-azure-1.0-SNAPSHOT.war <username>@< PublicIpAddress>:~/
使用 mv 命令将文件移动到 /opt/Wildfly/standalone/deployments/ 文件夹,Wildfly 将自动为你启动它。然后通过以下 URL 访问应用程序:
http://<VMPublicIpAddress>
做完这些,你就应该知道如何在云端 Linux VM 的 Wildfly 服务器上运行 Java 应用程序,以及访问 Azure 的 MySQL 数据库。配置步骤有很多,但一旦建立了初始环境,就可以很容易地设置部署管道,将新版本的代码和数据库推送到 Azure 环境中。
一如既往,我们重视你的反馈意见,请告诉我们你的想法!
关于作者
 Brian Benz 是微软的 Senior Cloud Developer Advocate,帮助 Java 开发人员充分利用 Azure。在加入微软之前,他是 IBM、德勤和其他公司的解决方案架构师、顾问、开发人员、作者和演讲者。可以通过 @bbenz 在 Twitter 上与他取得联系。
查看英文原文: Build a MySQL Spring Boot App Running on WildFly on an Azure VM


