
前言
在做电商类应用时,难免会遇到商品主图实现放大镜效果的场景,现有的基于Vue的第三方包不多并且无法直接复用,今天,我来分享一种高稳定性的基于 Vue 的图片放大镜方法。
实现原理
放大镜的原理用一句话概括,就是根据小图上的鼠标位置去定位大图。
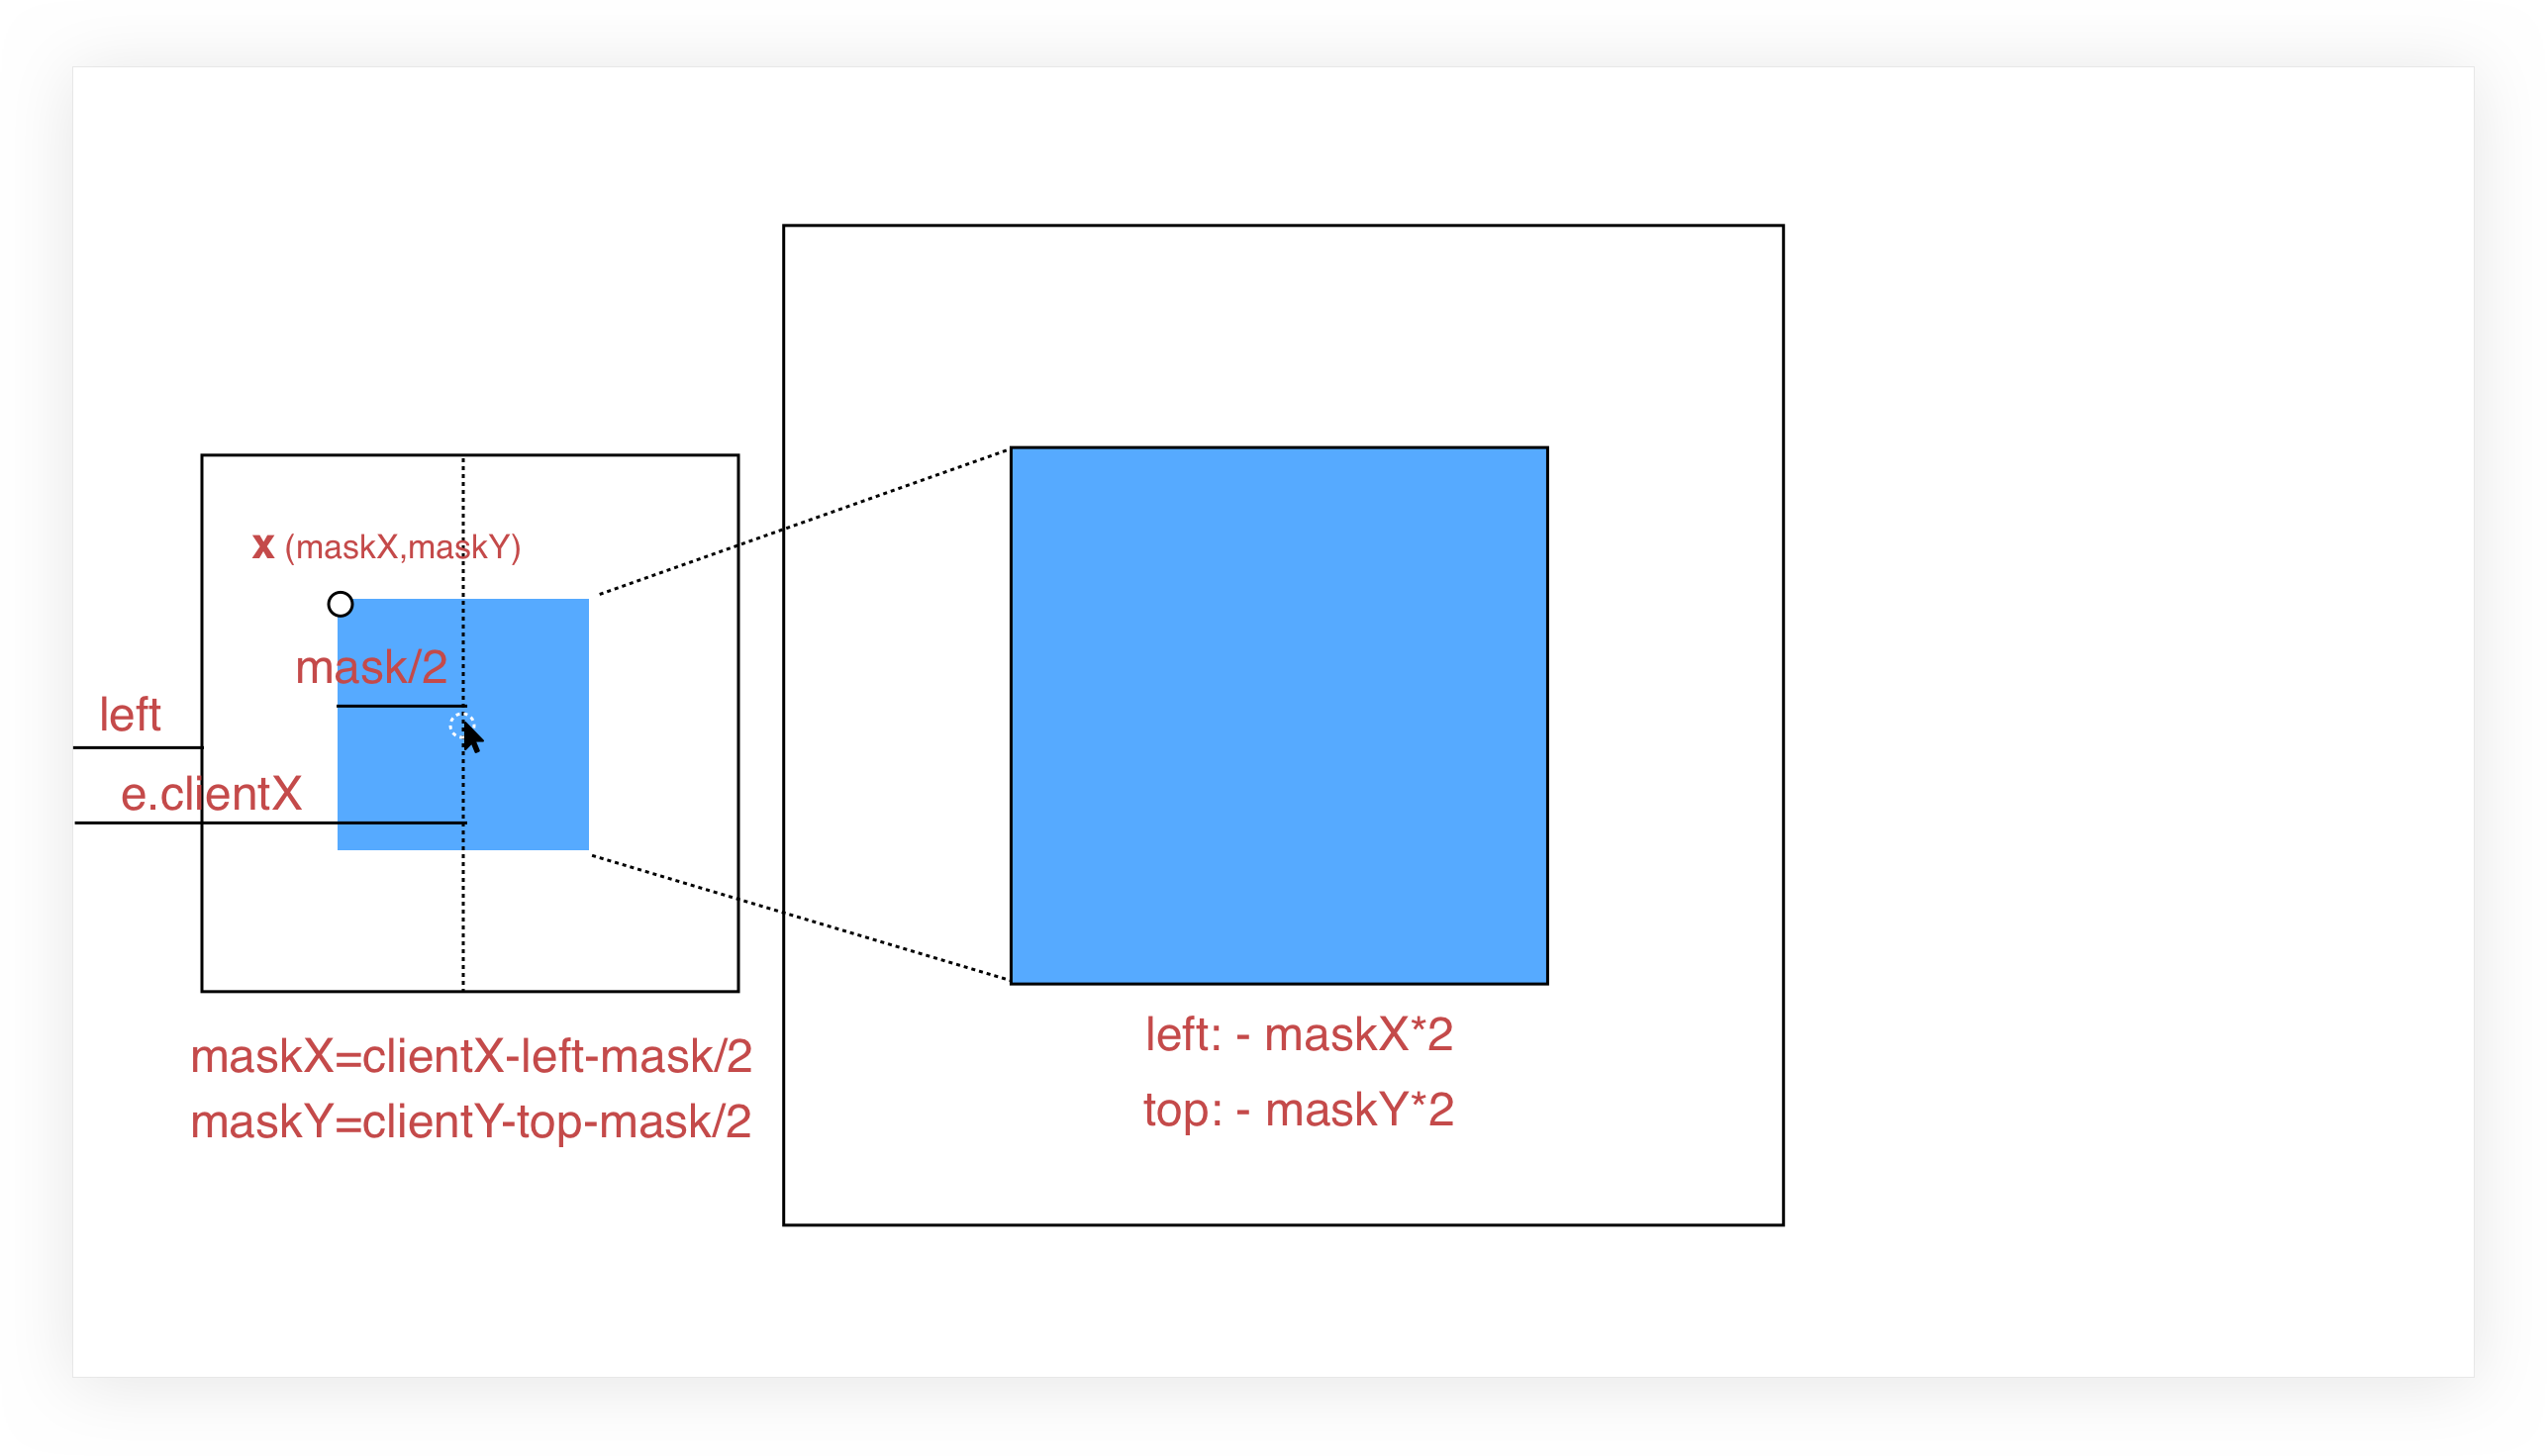
相信原理图已经画的很明白了, 图中,左侧框是小图框,其蓝色区域为图片遮罩层(需放大区域),右侧框是整个大图目前所在区域,其蓝色区域是放大区域,设置超出隐藏,就实现了放大遮罩区域的效果。
显然,两块蓝色区域存在着某种对应关系,即遮罩的左上角位置(相对于小图,以下称 X 坐标)和放大区域(相对于大图)的左上角位置是成比例的,即放大倍数。计算出 X 坐标后,适当调整背景图的位置,使大图向反方向移动 scale 倍的 X 坐标即可。
X 坐标为(maskX,maskY),以计算 maskX 为例:
鼠标移动中会产生 e.clientX ,标识鼠标与浏览器左侧的距离,小图与浏览器左侧的距离是 left ,由于遮罩始终是一个以鼠标为中心的正方形,所以:
maskX = e.clientX - left - mask/2
同理,
maskY = e.clientY - top - mask/2
大图的对应样式设置为:
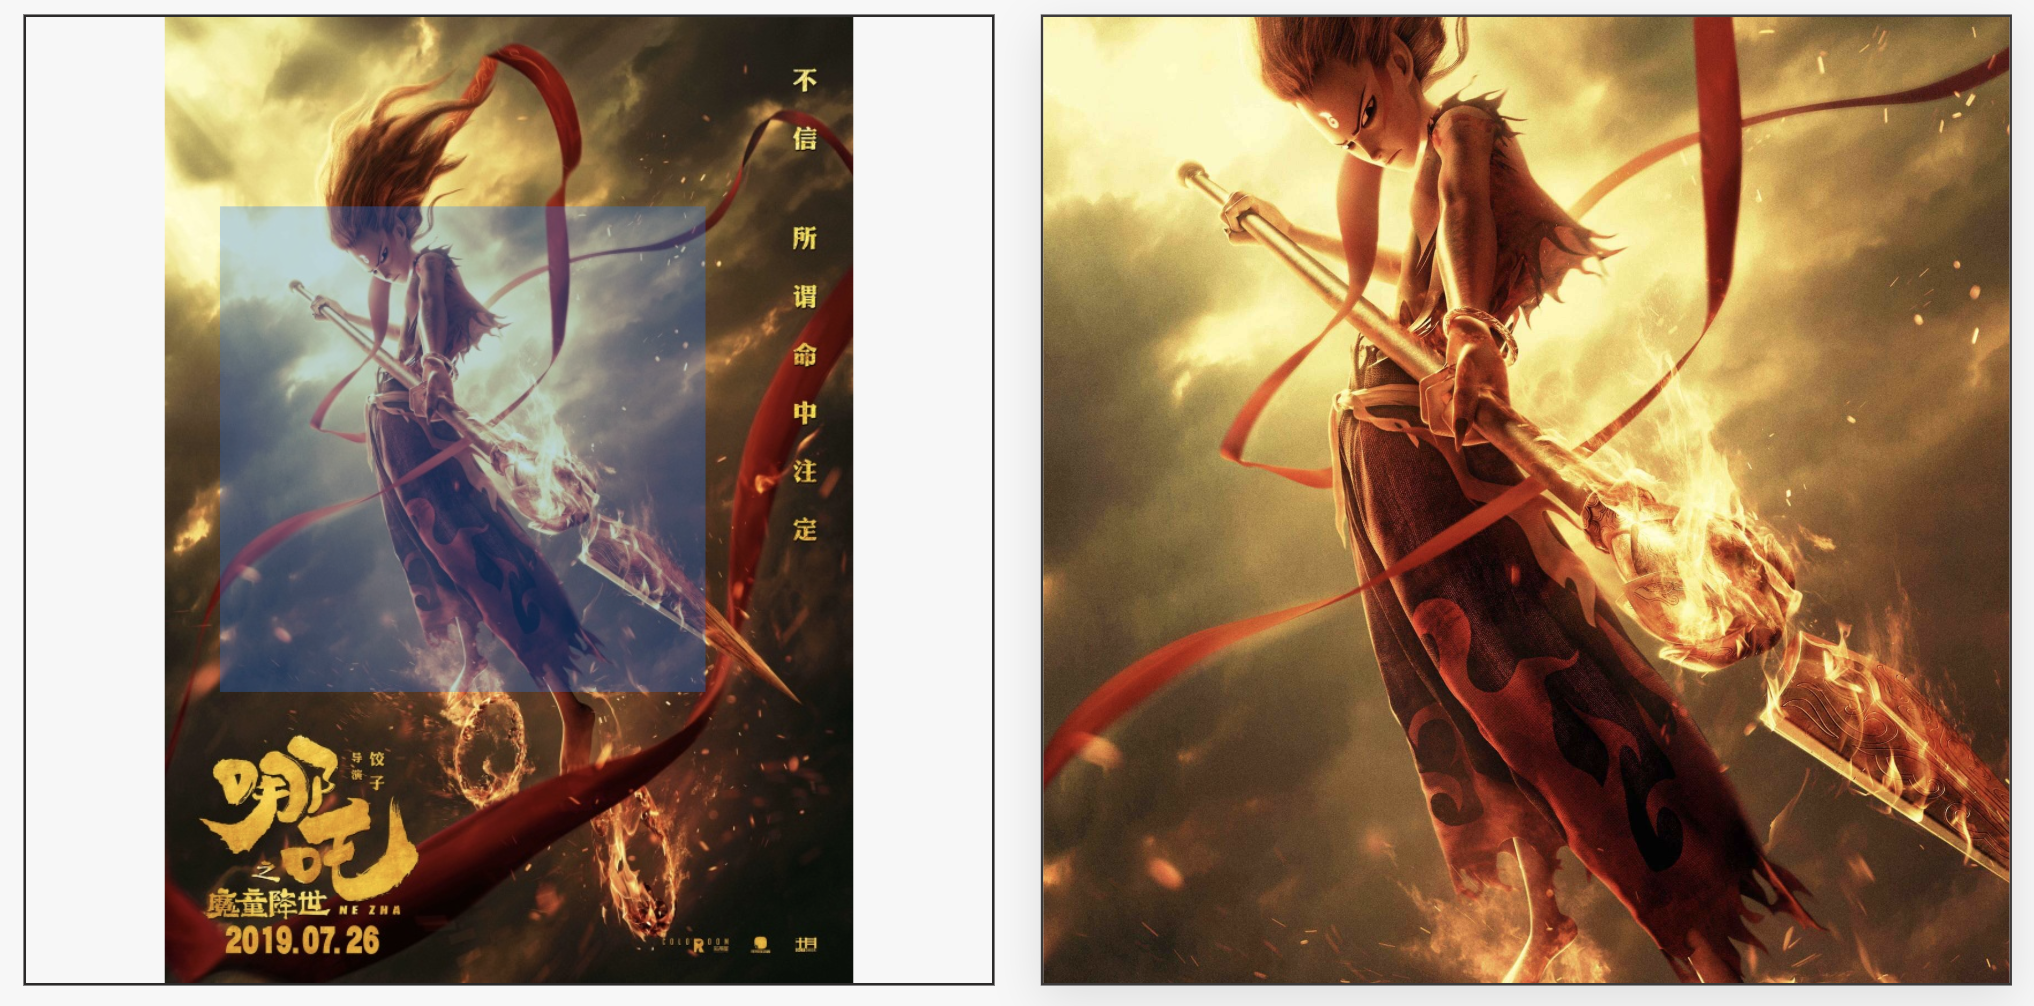
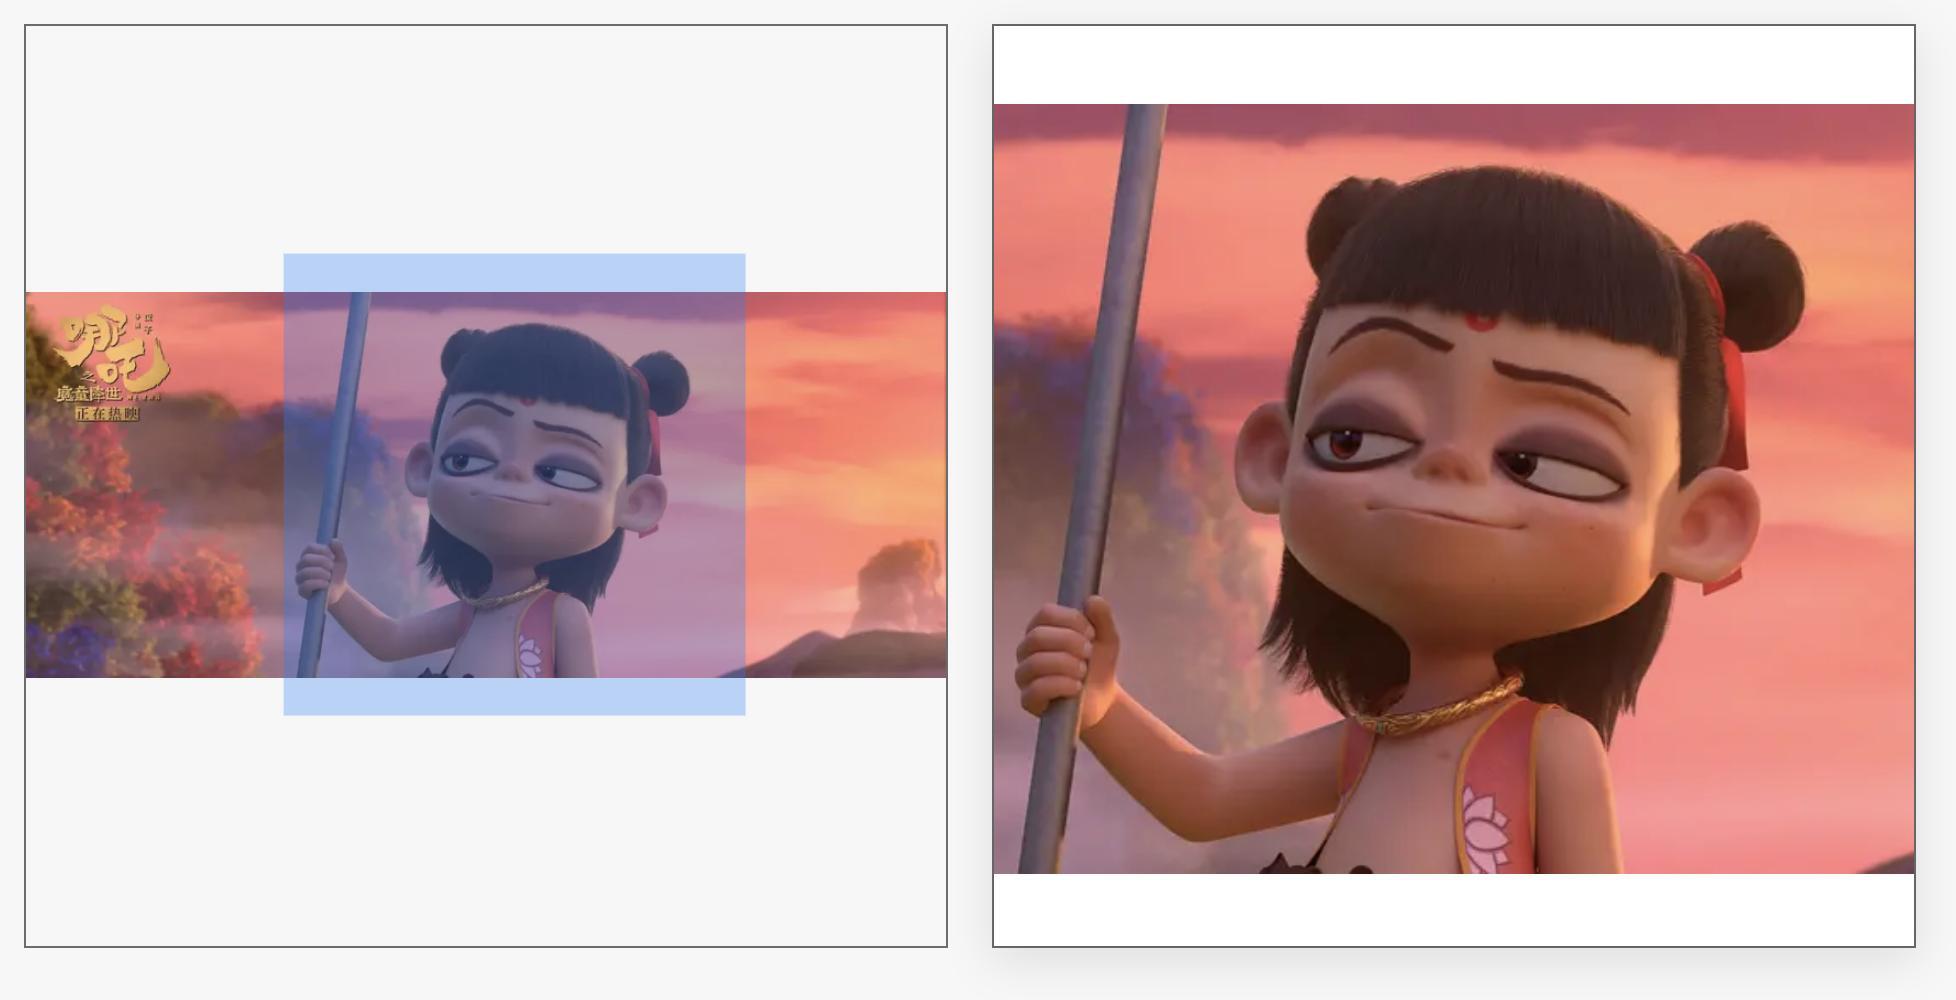
{ left: - maskX * scale + 'px'; top: - maskY * scale + 'px';}效果演示
核心代码
HTML
一般放大镜实现的是 1:1 等宽等高的正方形图片,这里兼容了其他比例的图片,设置图片为垂直居中对齐,包括小图,大图。如果小图不够充满整个小图框,余留下的空白部分也可以有放大效果,只不过放大结果依然是空白。 这样只需计算背景图的移动距离,不用过多的关注图片定位问题。
<template> <div class="magnifier"> <!-- 小图 --> <div class="small-box" @mouseover="handOver" @mousemove="handMove" @mouseout="handOut"> <img class="smallPic" :src="`${src}?x-oss-process=image/resize,l_836`" /> <div class="magnifier-zoom" v-show="showMask" :style="{ background: configs.maskColor, height: configs.maskWidth + 'px', width: configs.maskHeight + 'px', opacity: configs.maskOpacity, transform: transformMask }" ></div> </div> <!-- 大图, 注意误差 --> <div class="magnifier-layer" v-show="showMagnifier" :style="{ width: configs.width + 'px', height: configs.height + 'px', left: configs.width + 20 + 'px' }" > <div class="big-box" :style="{ width: bigWidth + 'px', height: bigHeight + 'px', left: moveLeft, top: moveTop }" > <div class="big-box-img" :style="{ width: bigWidth - 2 + 'px', height: bigHeight - 2 + 'px' }" > <img :src="bigSrc" :style="{ maxWidth: bigWidth - 2 + 'px', maxHeight: bigHeight -2 + 'px' }" /> </div> </div> </div> </div></template>JS
这里主要有三个事件函数。
handOver:鼠标进入到小图框上的事件,此时显示遮罩和放大区域,并计算小图框的位置信息。
handOver() { // 计算小图框在浏览器中的位置 this.imgObj = this.$el.getElementsByClassName('small-box')[0]; this.imgRectNow = this.imgObj.getBoundingClientRect(); this.showMagnifier = true; this.showMask = true;}handMove:鼠标在小图上的移动事件,此事件发生在 handOver 之后,计算数据,移动遮罩以及背景图;
handMove(e) { // 计算初始的遮罩左上角的坐标 let objX = e.clientX - this.imgRectNow.left; let objY = e.clientY - this.imgRectNow.top; // 计算初始的遮罩左上角的坐标 let maskX = objX - this.configs.maskWidth / 2; let maskY = objY - this.configs.maskHeight / 2; // 判断是否超出界限,并纠正 maskY = maskY < 0 ? 0 : maskY; maskX = maskX < 0 ? 0 : maskX; if(maskY + this.configs.maskHeight >= this.imgRectNow.height) { maskY = this.imgRectNow.height - this.configs.maskHeight; } if(maskX + this.configs.maskWidth >= this.imgRectNow.width) { maskX = this.imgRectNow.width - this.configs.maskWidth; } // 遮罩移动 this.transformMask = `translate(${maskX}px, ${maskY}px)`; // 背景图移动 this.moveLeft = - maskX * this.configs.scale + "px"; this.moveTop = - maskY * this.configs.scale + "px";}handOut:鼠标离开小图事件,此时无放大镜效果,隐藏遮罩和放大区域。
handOut() { this.showMagnifier = false; this.showMask = false;}以上三个事件基本上就实现了图片的放大镜功能。
但仔细看,你会发现每次移入小图框都会触发一次 handOver 事件,并且计算一次小图框 dom (imgObj) 。
为了优化此问题,可以用 init 标识是否是页面加载后首次触发 handOver 事件,如果是初始化就计算 imgObj 信息,否则不计算。
handOver() { if (!this.init) { this.init = true; // 原 handOver 事件 ... } this.showMagnifier = true; this.showMask = true;},在测试的过程中,发现页面滚动后,会出现遮罩定位错误的情况,原来是因为初始化时,我们固定死了小图框的位置信息(存放在 this.imgRectNow ),导致 handMove 事件中的移动数据计算错误。
解决这个问题有两种方案:
监听 scroll 事件,更新 this.imgRectNow;
在 handMove 事件中更新 this.imgRectNow。
这里选择了第二种。
handMove(e) { // 动态获取小图的位置(或者监听 scroll ) let imgRectNow = this.imgObj.getBoundingClientRect(); let objX = e.clientX - imgRectNow.left; let objY = e.clientY - imgRectNow.top; // 原 handMove 事件剩余内容 ...},综合以上,我们已经实现了一个完美的图片放大镜功能。最终的 js 如下所示:
data() { return { imgObj: {}, moveLeft: 0, moveTop: 0, transformMask:`translate(0px, 0px)`, showMagnifier:false, showMask:false, init: false, };},computed: { bigWidth(){ return this.configs.scale * this.configs.width; }, bigHeight(){ return this.configs.scale * this.configs.height; }},methods: { handMove(e) { // 动态获取小图的位置(或者监听 scroll ) let imgRectNow = this.imgObj.getBoundingClientRect(); let objX = e.clientX - imgRectNow.left; let objY = e.clientY - imgRectNow.top; // 计算初始的遮罩左上角的坐标 let maskX = objX - this.configs.maskWidth / 2; let maskY = objY - this.configs.maskHeight / 2; // 判断是否超出界限,并纠正 maskY = maskY < 0 ? 0 : maskY; maskX = maskX < 0 ? 0 : maskX; if(maskY + this.configs.maskHeight >= imgRectNow.height) { maskY = imgRectNow.height - this.configs.maskHeight; } if(maskX + this.configs.maskWidth >= imgRectNow.width) { maskX = imgRectNow.width - this.configs.maskWidth; } // 遮罩移动 this.transformMask = `translate(${maskX}px, ${maskY}px)`; // 背景图移动 this.moveLeft = - maskX * this.configs.scale + "px"; this.moveTop = - maskY * this.configs.scale + "px"; }, handOut() { this.showMagnifier = false; this.showMask = false; }, handOver() { if (!this.init) { this.init = true; this.imgObj = this.$el.getElementsByClassName('small-box')[0]; } this.showMagnifier = true; this.showMask = true; }}使用方法
本示例中的固定参数:小图框:420 * 420 。
程序可接受参数:
// 小图地址src: { type: String,},// 大图地址bigSrc: { type: String,},// 配置项configs: { type: Object, default() { return { width:420,//放大区域 height:420,//放大区域 maskWidth:210,//遮罩 maskHeight:210,//遮罩 maskColor:'rgba(25,122,255,0.5)',//遮罩样式 maskOpacity:0.6, scale:2,//放大比例 }; }}总结
其实图片放大镜的实现思路没有那么复杂,核心点有两点:
小图、大图的定位,遮罩和放大区域的创建方法
放大镜的原理理解,并用代码实现 dom 的移动等。
本文顺着这个思路,做了一个简单的实现,还有一些优化的空间,欢迎各位大佬在评论区讨论。虽然代码看起来不是非常优雅,但是足够明了,感兴趣的同学可以自己尝试一下。
头图:Unsplash
作者:一玲
原文:https://mp.weixin.qq.com/s/_4TEiywnmre1wdqHxQaPLg
原文:基于 Vue 的商品主图放大镜方案
来源:政采云前端团队 - 微信公众号 [ID:Zoo-Team]
转载:著作权归作者所有。商业转载请联系作者获得授权,非商业转载请注明出处。


