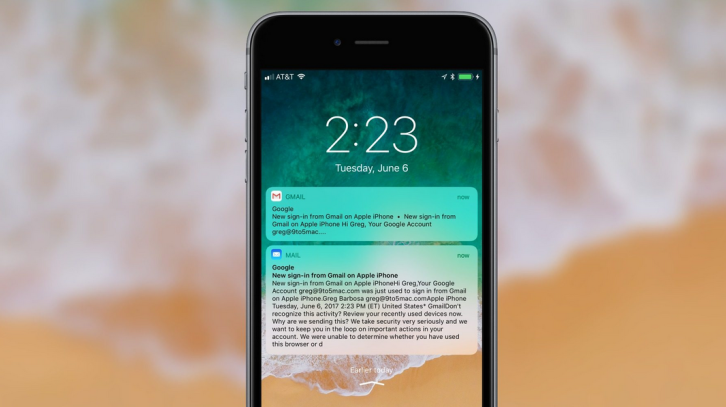
导语 | 消息推送我们几乎每天都会用到,但你知道 iOS 中的消息推送是如何实现的吗?本文将从推送权限申请,到本地和远程消息推送,再到 App 对推送消息的处理等多个步骤,详细介绍 iOS 中消息推送的工作流程。文章作者:赵哲,腾讯游戏运营研发工程师。
一、概述
消息推送是一种 App 向用户传递信息的重要方式,无论 App 是否正在运行,只要用户打开了通知权限就能够收到推送消息。
开发者通过调用 iOS 系统方法就可以发起本地消息推送,例如我们最常见的闹钟应用,App 能够根据本地存储的闹钟信息直接发起本地通知,因此即使没有网络也能收到闹钟提醒。
远程消息推送则是由业务方服务器将消息内容按照固定格式发送到 Apple Push Notitfication service(简称 APNs),然后再经由苹果的 APNs 服务器推送到用户设备上,例如腾讯新闻可以向用户推送时事热点新闻,QQ 邮箱可以为用户推送收到新邮件的提醒,游戏 App 可以通过这种方式通知玩家有新的游戏福利。
既能够及时地通知用户重要信息,也能够促使用户通过推送消息打开或唤醒 App,提高 App 的使用率。
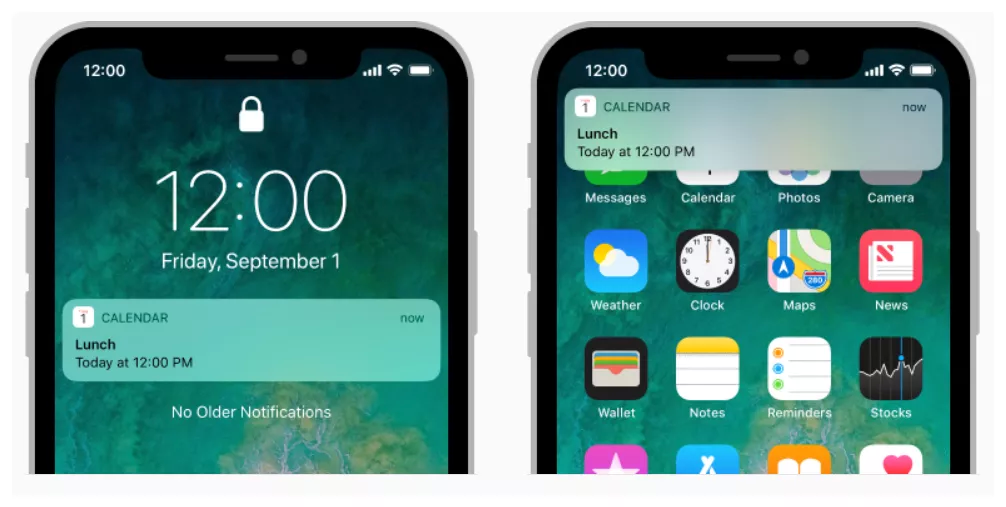
除了标题、内容、提示音和角标数字等固定推送参数以外,开发者还可以在推送消息中增加自定义参数,让用户在点击推送消息时能够直达相关新闻、邮件或福利页面,提供更好的用户体验和页面的曝光率。
二、XCode 配置
在使用消息推送相关功能之前,我们首先需要准备支持推送功能的证书,个人开发者可以参考腾讯云的 TPNS 文档 [1],在苹果开发者中心中配置和导出推送证书。
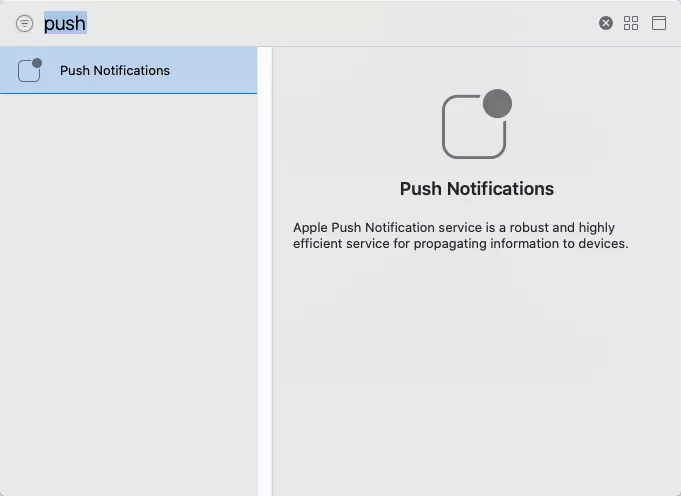
此外,还需要在 XCode 的工程配置 Signing & Capabilities 配置中增加消息推送权限,在操作完成后 Xcode 会自动生成或更新工程的 entitlements 文件,增加如图所示的 APS Environment 字段。

三、申请消息推送权限
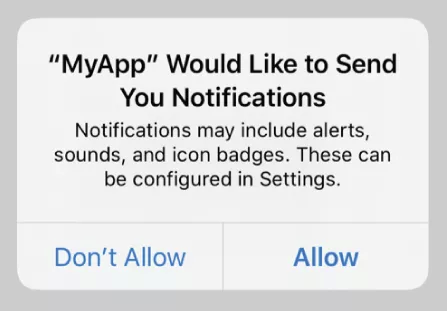
无论是本地推送还是远程推送,在推送前都必须要先向用户申请推送权限,只有用户授权后才能够收到推送消息。
苹果在 iOS10 中引入了 UserNotifications 框架,将推送相关功能进行了封装和升级,除了以前 UIApplication 可以做到的一些基本的本地和远程消息推送功能外,还增加了撤回或修改推送消息、自定义通知 UI、推送消息前台显示等功能。
在 iOS10 及以上的版本中,苹果推荐开发者使用:
requestAuthorizationWithOptions:completionHandler: 方法向用户申请消息推送权限。
该方法需要指定一个用于描述推送权限的 UNAuthorizationOptions 类型参数,包括 alert (消息的标题、文字等内容)、sound(消息提示音)、badge(App 右上角显示的角标);还可以在该方法的 completionHandler 回调方法中通过 granted 参数来判断用户是否允许了授权。相关代码如下:
                              #import <UserNotifications/UserNotifications.h>


                            ……


                            [[UNUserNotificationCenter currentNotificationCenter]


                            requestAuthorizationWithOptions:UNAuthorizationOptionSound|UNAuthorizationOptionAlert|UNAuthorizationOptionBadge


                            completionHandler:^(

                              BOOL

                            granted, NSError * _Nullable

                              error

                            ) {


                              if

                            (granted){


                              // 用户允许了推送权限申请


                            }

                              else

                            {


                              // 用户拒绝了推送权限申请


                            }


                            }];
在 iOS9 中,直接使用 UIApplication 的 registerUserNotificationSettings 方法即可,该方法同样需要通过配置 sound、alert、badge 等参数,但是没有提供用于判断用户点击了授权还是拒绝的回调方法。相关代码如下:
                            [[

                              UIApplication

                            sharedApplication] registerUserNotificationSettings:


                            [

                              UIUserNotificationSettings

                            settingsForTypes:


                            (

                              UIUserNotificationTypeSound

                            | UIUserNotificationTypeAlert | UIUserNotificationTypeBadge)


                            categories:nil]]

                              ;
要注意无论是 UserNotifications 还是 UIApplication 的申请推送权限的方法,上文中的申请用户授权的系统弹窗都只会显示一次,iOS 会记录用户对于该 App 的授权状态,不会向用户重复申请授权。
消息推送是 App 的一项重要功能,同时也是很好的运营手段,因此很多 App 在启动后会检查消息推送的授权状态,如果用户拒绝了消息推送权限,仍然会以一定的频率弹窗提醒用户,在 iOS 的设置中心中再去打开 App 的推送权限。相关代码如下:
                              if

                            (@available(iOS

                              10.0

                            ,*)){


                            [[UNUserNotificationCenter currentNotificationCenter] getNotificationSettingsWithCompletionHandler:^(UNNotificationSettings
                            * _Nonnull settings) {


                              if

                            (UNAuthorizationStatusDenied == settings.authorizationStatus) {


                              // 用户拒绝消息推送,弹窗提示引导用户去系统设置中进行授权


                              UIAlertController

                            * alert = [

                              UIAlertController

                            alertControllerWithTitle:

                              @" 未打开推送功能 "

                            message:

                              @" 请在设备的\" 设置 -App- 通知\" 选项中,允许通知 "

                            preferredStyle:

                              UIAlertControllerStyleAlert

                            ];


                              UIAlertAction

                            * cancel = [

                              UIAlertAction

                            actionWithTitle:

                              @" 取消 "

                            style:

                              UIAlertActionStyleCancel

                            handler:^(

                              UIAlertAction

                            * action){


                            [alert dismissViewControllerAnimated:

                              YES

                            completion:

                              nil

                            ];


                            }];


                              UIAlertAction

                            * ok = [

                              UIAlertAction

                            actionWithTitle:

                              @" 去设置 "

                            style:

                              UIAlertActionStyleDefault

                            handler:^(

                              UIAlertAction

                            * action){


                            [alert dismissViewControllerAnimated:

                              YES

                            completion:

                              nil

                            ];


                              NSURL

                            * url = [

                              NSURL

                            URLWithString:

                              UIApplicationOpenSettingsURLString

                            ];


                              if

                            ([[

                              UIApplication

                            sharedApplication] canOpenURL:url])


                            {


                              NSURL

                            *url =[

                              NSURL

                            URLWithString:

                              UIApplicationOpenSettingsURLString

                            ];


                            [[

                              UIApplication

                            sharedApplication] openURL:url];


                            }


                            }];


                            [alert addAction: cancel];


                            [alert addAction: ok];


                            [[

                              UIApplication

                            sharedApplication].keyWindow.rootViewController presentViewController:alert
                            animated:

                              YES

                            completion:

                              nil

                            ];


                            }


                            }];


                            }

                              else

                            {


                              UIUserNotificationSettings

                            *setting = [[

                              UIApplication

                            sharedApplication] currentUserNotificationSettings];


                              if

                            (

                              UIUserNotificationTypeNone

                            == setting.types) {


                              // 用户拒绝消息推送,处理方式同上


                            }


                            }
四、本地推送
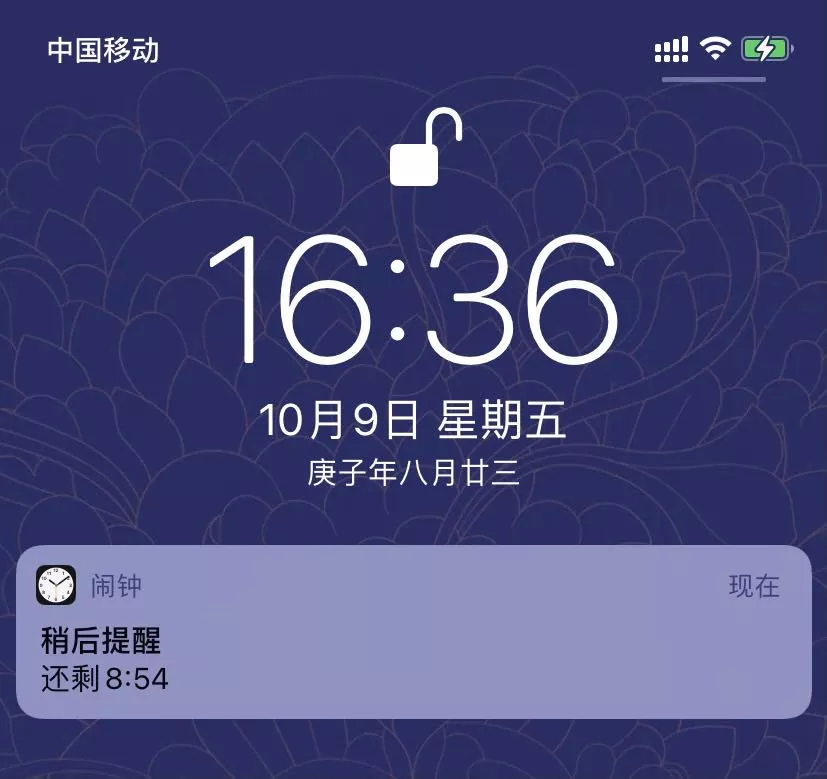
在 iOS10 中,UserNotifications 框架为我们提供了 UNMutableNotificationContent 对象描述消息推送的标题、内容、提示音、角标等内容。UNNotificationTrigger 对象描述消息推送的推送时间策略,UNNotificationRequest 对象整合推送内容和时间。
每个 Request 对象都需要配置一个 id 来标识该条推送内容,UNUserNotificationCenter 通过该 id 来管理(包括增加、删除、查询和修改)所有的 Request。
UNNotificationTrigger 有四个子类,分别是 UNTimeIntervalNotificationTrigger 用于通过时间间隔控制消息推送;UNCalendarNotificationTrigger 通过日期控制消息推送;UNLocationNotificationTrigger 通过地理位置控制消息推送;UNPushNotificationTrigger 远程消息推送对象。相关代码如下:
                              // 推送内容


                            UNMutableNotificationContent* content = [[UNMutableNotificationContent
                            alloc] init];


                            content.title = @

                              " 推送标题 "

                            ;


                            content.body = @

                              " 推送内容 "

                            ;


                            content.sound = [UNNotificationSound defaultSound];

                              // 默认提示音


                              // 日期推送,今日 15:53:00 推送本地消息


                            NSDateComponents* date = [[NSDateComponents alloc] init];


                            date.hour =

                              15

                            ;


                            date.minute =

                              53

                            ;


                            UNCalendarNotificationTrigger* calendarTrigger = [UNCalendarNotificationTrigger


                              triggerWithDateMatchingComponents:

                            date

                              repeats:

                            NO];


                              // 倒计时推送,2s 后推送本地消息


                            UNTimeIntervalNotificationTrigger *intervalTrigger = [UNTimeIntervalNotificationTrigger

                              triggerWithTimeInterval:


                              2


                              repeats:

                            NO];


                            UNNotificationRequest* request = [UNNotificationRequest


                              requestWithIdentifier:

                            @

                              "testId"


                              content:

                            content

                              trigger:

                            calendarTrigger];


                              // 将推送请求添加到管理中心才会生效


                            UNUserNotificationCenter* center = [UNUserNotificationCenter currentNotificationCenter];


                            [center

                              addNotificationRequest:

                            request

                              withCompletionHandler:

                            ^(NSError * _Nullable error) {


                              if

                            (error != nil) {


                            NSLog(@

                              "%@"

                            , error.localizedDescription);


                            }


                            }];
在 iOS9 中,UIApplication 提供了 presentLocalNotificationNow 和 scheduleLocalNotification 两个本地消息推送的方法。分别表示立即推送和按照固定日期推送,UILocalNotification 同时描述了消息内容和推送的时机。
示例代码是一个 2s 后推送的本地消息,soundName 属性用于描述消息的提示音,用户可以自定义提示音(需要将音频文件打包到安装包中)或者使用默认提示音乐,repeatInterval 和 repeatCalendar 属性分别用于根据时间差和日期进行重复提示的操作。相关代码如下:
                            UILocalNotification *

                              notification

                            = [[UILocalNotification alloc] init];


                            notification.

                              fireDate

                            = [NSDate dateWithTimeIntervalSinceNow:

                              2

                            ];


                            notification.

                              alertTitle

                            = @

                              " 推送标题 "

                            ;


                            notification.

                              alertBody

                            = @

                              " 推送内容 "

                            ;


                            //notification.

                              soundName

                            = UILocalNotificationDefaultSoundName;


                            notification.

                              soundName

                            = @

                              "mysound.wav"

                            ;


                            [[UIApplication sharedApplication] scheduleLocalNotification:notification];
五、远程推送
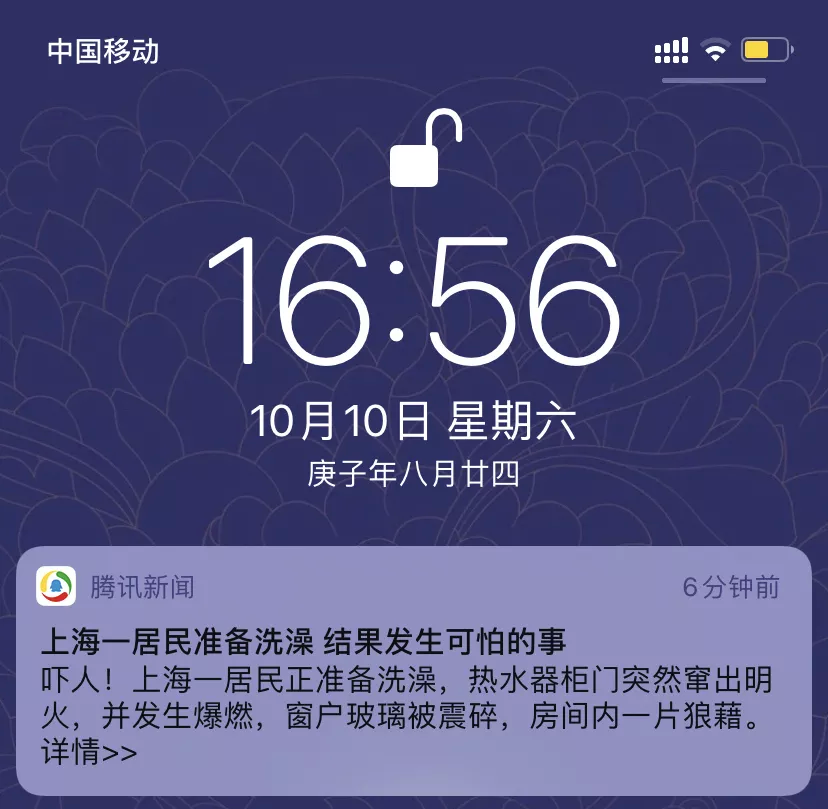
不同于本地消息推送不依赖网络请求,可以直接调用 iOS 系统方法,远程消息推送的实现涉及到用户设备、我们自己的业务方服务器和苹果的 APNs 服务的交互。
不同于 Android 系统中远程消息推送的实现,需要 App 自身通过后台服务与业务服务器维持长链接通信,iOS 中的消息推送是操作系统与苹果的 APNs 服务器直接交互实现的,App 自身并不需要维持与服务器的连接。
只要用户开启了推送权限,我们的业务服务器就可以随时通过调用 APNs 服务向用户推送通知,这样既能够为开发者和用户提供安全稳定的推送服务,也够节省系统资源消耗,提高系统流畅度和电池续航能力。
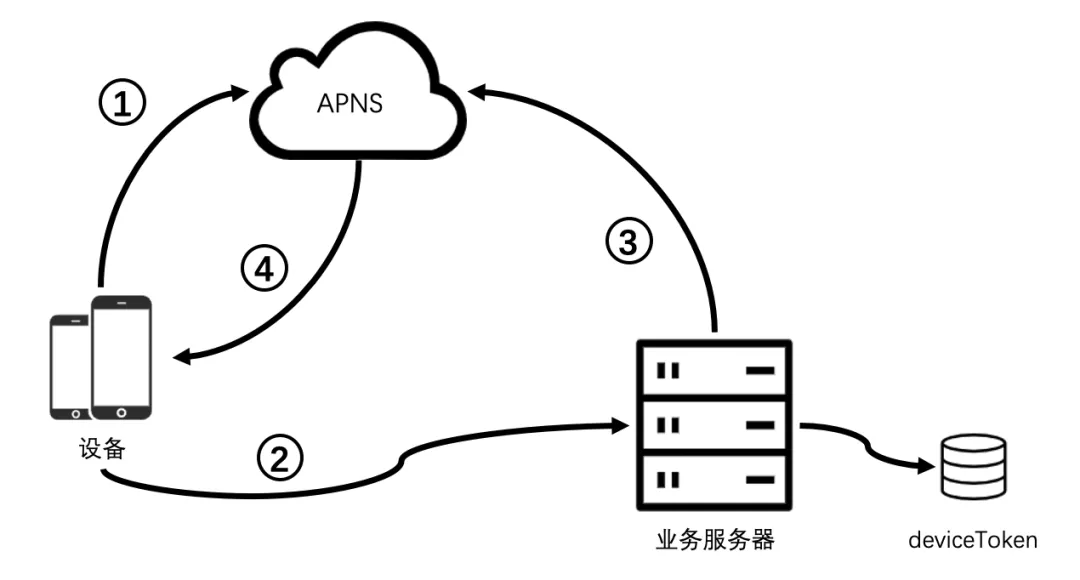
iOS 客户端远程消息推送的实现可以分为以下几个流程:
- 用户的 iphone 通过 iOS 的系统方法调用与苹果的 APNs 服务器通信,获取设备的 deviceToken,它是由 APNs 服务分配的用于唯一标识不同设备上的不同 App,可以认为是由 deviceID、bundleId 和安装时的相关信息生成的,App 的升级操作 deviceToken 不变,卸载重装 App、恢复和重装操作系统后的 deviceToken 会发生变化。
- 苹果的 APNs 服务是基于 deviceToken 实现的,因此需要将设备的 deviceToken 发送到我们的业务服务器中,用于后续的消息推送。一个设备可能登录过多个用户,一个用户也可能在多个设备中登录过,当我们需要给不同用户推送不同的消息时,除了 deviceToken 之外,我们还需要保存用户的 openid 与 deviceToken 的映射关系。我们可以在用户登录成功后的时机更新 openid 和 deviceToken 的映射关系,用户退出后取消映射关系,只保存用户最后登录设备的 deviceToken,避免一个设备收到多个重复通知和一个用户在不同设备收到多个通知等情况。
- 在新闻类 App 出现事实热点新闻时,后台服务就可以携带消息内容和 deviceToken 等内容,向苹果的 APNs 服务发起消息推送请求,推送消息的实现是异步的,只要请求格式和 deviceToken 检查通过 APNs 服务就不会报错,但是用户还是可能因为网络异常或者关闭了推送权限等原因收不到推送消息。
- APNs 服务向用户设备推送消息这一步也是异步的,在用户关机或网络异常收不到推送的情况下,APNs 会为每个 deviceToken 保留最后一条推送消息,待网络恢复后再次推送。
1. 获取设备 deviceToken
在 App 启动时,我们可以通过 UIApplication 的 registerForRemoteNotifications 方法向苹果的 APNS 服务器请求 deviceToken。
如果请求成功,则 didRegisterForRemoteNotificationsWithDeviceToken 回调方法会被执行,为了便于业务服务器的调用,我们一般会将二进制的 deviceToken 转换为 16 进制的字符串后再进行存储。
如果请求失败,则 didFailToRegisterForRemoteNotificationsWithError 方法也会被调用,并附带具体的错误信息。相关代码如下:
                              // 调用系统方法请求 deviceToken


                            - (

                              BOOL

                            )application:(

                              UIApplication

                            *)application didFinishLaunchingWithOptions:(

                              NSDictionary

                            *)launchOptions {


                            [[

                              UIApplication

                            sharedApplication] registerForRemoteNotifications];


                            }


                              //deviceToken 获取成功的回调


                            - (

                              void

                            )application:(

                              UIApplication

                            *)application didRegisterForRemoteNotificationsWithDeviceToken:(

                              NSData

                            *)deviceToken{


                              NSString

                            *deviceTokenStr;


                              NSUInteger

                            length = deviceToken.length;


                              if

                            (![deviceToken isKindOfClass:[

                              NSData


                              class

                            ]] || length ==

                              0

                            ) {


                              return

                            ;


                            }


                              const


                              unsigned


                              char

                            *bytes = (

                              const


                              unsigned


                              char

                            *)deviceToken.bytes;


                              NSMutableString

                            *hex = [

                              NSMutableString

                            new];


                              for

                            (

                              NSInteger

                            i =

                              0

                            ; i < deviceToken.length; i++) {


                            [hex appendFormat:

                              @"%02x"

                            , bytes[i]];


                            }


                            deviceTokenStr = [hex

                              copy

                            ];


                              NSLog

                            (

                              @"%@"

                            , deviceTokenStr);


                            }


                              //deviceToken 获取失败的回调


                            - (

                              void

                            )application:(

                              UIApplication

                            *)application didFailToRegisterForRemoteNotificationsWithError:(

                              NSError

                            *)error{


                              NSLog

                            (

                              @"error,%@"

                            ,error);


                            }
2. 后台调用 APNs 推送
业务方服务器调用 APNs 服务时首先要建立安全连接,进行开发者身份的认证,分为基于证书(Certificate-Based)和基于 Token(Token-Based)的认证两种方式,比较常用的是基于证书的认证方式。
推送证书分为开发环境和生产环境的证书,分别对应不同的 APNs 推送接口,我们从苹果开发者平台或者第三方平台导出的推送证书一般有 p12 和 pem 两种格式的文件,为了便于接口调用我们可以通过以下命令将 p12 格式的文件转换为 pem 证书。
                              openssl

                            pkcs12 -in

                              push_dev.p12

                            -out

                              push_dev.pem

                            -nodes
基于证书建立 TLS 连接的流程如下图所示:
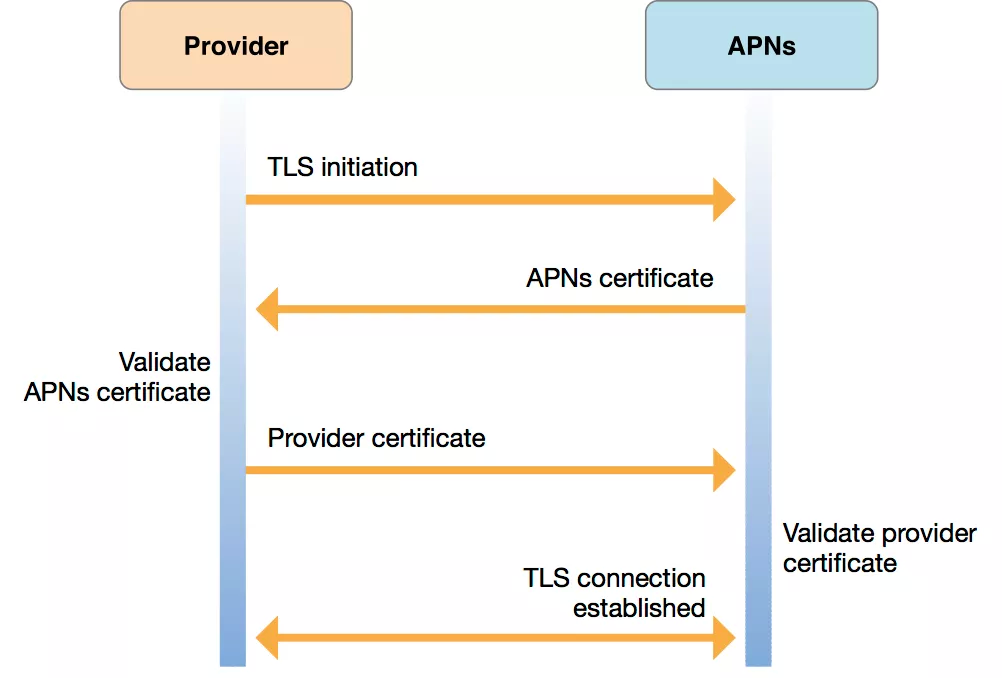
- 业务方服务器(Provider)向 APNs 服务器发起建立 TLS 连接的请求。
- APNs 服务器返回的它的证书,供业务方服务器校验。
- 业务方服务器提供自己的推送证书,供 APNs 服务器校验。
- APNs 服务器验证业务方服务器提供的推送证书无误后,TLS 连接就已经建立完成,之后业务方服务器就可以直接向 APNs 发送消息推送请求了。
业务方与 APNs 建立请求的简易实现的 PHP 代码实现如下:
                            $deviceToken=

                              '22124c450762170ca2ddb32a50381dd2c3026dbdb020f6dddcabefdca724fdd6'

                            ;


                              //dev params


                            $devUrl =

                              'ssl://gateway.sandbox.push.apple.com:2195'

                            ;


                            $devCertificate =

                              'push_dev.pem'

                            ;


                              //product params


                            $proUrl =

                              'ssl://gateway.push.apple.com:2195'

                            ;


                            $proCertificate =

                              'push_pro.pem'

                            ;


                              // Change 2 : If any


                            $title =

                              '标题'

                            ;

                              // 消息标题


                            $content =

                              '消息内容'

                            ;

                              // 内容


                            $ctx = stream_context_create();


                              // Change 3 : APNS Cert File name and location.


                            stream_context_set_option($ctx,

                              'ssl'

                            ,

                              'local_cert'

                            , $devCertificate);


                              // Open a connection to the APNS server


                            $fp = stream_socket_client($devUrl, $err, $errstr,

                              60

                            , STREAM_CLIENT_CONNECT|STREAM_CLIENT_PERSISTENT, $ctx);


                              if

                            (!$fp)


                              exit

                            (

                              "Failed to connect: $err $errstr"

                            . PHP_EOL);


                              echo


                              'Connected to APNS'

                            . PHP_EOL;


                              // Create the payload body


                            $body[

                              'aps'

                            ] =

                              array

                            (


                              'alert'

                            =>

                              array

                            (


                              'title'

                            =>$title,


                              'body'

                            =>$content


                            ),


                              'sound'

                            =>

                              'default'


                            );


                              // 自定义内容


                            $body[

                              'userInfo'

                            ] =

                              array

                            (


                              'url'

                            =>

                              'https://www.qq.com'

                            ,


                            );


                              // Encode the payload as JSON


                            $payload = json_encode($body);


                              // Build the binary notification


                            $msg = chr(

                              0

                            ) . pack(

                              'n'

                            ,

                              32

                            ) . pack(

                              'H*'

                            , $deviceToken) . pack(

                              'n'

                            , strlen($payload)) . $payload;


                              // Send it to the server


                            $result = fwrite($fp, $msg, strlen($msg));


                              // 发送多个就调用多次 fwrite


                              //$result = fwrite($fp, $msg, strlen($msg));


                              echo

                            $msg;


                              if

                            (!$result)


                              echo


                              'Message not delivered'

                            . PHP_EOL;


                              else


                              echo


                              'Message successfully delivered'

                            . PHP_EOL;


                              // Close the connection to the server


                            fclose($fp);
业务方服务器通过证书与 APNs 建立安全连接后可以进行连续多次的消息推送操作,每次消息推送都要指定 deviceToken 和 Payload 参数。
Payload 是一个 json 对象,用于配置 iOS 在收到远程消息推送时的展现形式,aps 参数包含了苹果预设的 alert、sound、badge 等参数,其中 alert 参数可以是字符串,或者包含 title、body 等参数的字典类型;badge 参数使用整形设置 App 图标右上角显示的数字,badge 设置为 0 时角标不会显示;sound 参数用于设置推送的声音,不传该参数或者传递空字符串则推送不会发出提示音,设置为 default 时使用系统默认提示音,也可以设置为具体的音频文件名,需要提前音频文件放到项目的 bundle 目录,且时长不能超过 30s。
除了预设参数以外,我们还可以在 aps 的同级自定义一些参数,这些参数也可以是字典类型,再嵌套其他参数,例如示例代码中我们自定义的 userInfo 对象,但是一般推送消息的 payload 不宜过大,应控制在 4K 以内,建议只透传一些 id 和 url 等关键参数,具体的内容由客户端在收到推送时再去通过网络请求获取。
                            {


                              "aps"

                            : {


                              "alert"

                            : {


                              "title"

                            :

                              "Game Request"

                            ,


                              "subtitle"

                            :

                              "Five Card Draw"

                            ,


                              "body"

                            :

                              "Bob wants to play poker"

                            ,


                            },


                              "badge"

                            :

                              9

                            ,


                              "sound"

                            :

                              "gameMusic.wav"

                            ,


                            },


                              "gameID"

                            :

                              "12345678"


                            }
上述 payload 包含了常见的推送消息的标题、副标题、内容、消息提示音、App 的角标数字等预设参数,以及一个开发者自定义的 gameID 参数。用户点击推送消息后会自动启动或从后台唤醒 App,我们可以在系统的回调方法中获取到自定义参数,并根据 gameID 自动为用户打开该游戏页面。
3. 消息推送调试工具
在进行 APNs 接口调试时,我们可以利用一些优秀的推送调试工具帮助我们验证 payload 或证书等内容的合法性。本文介绍两款比较流行的开源软件,分别是国外的 Knuff 和国内开发者维护的 smartPush。
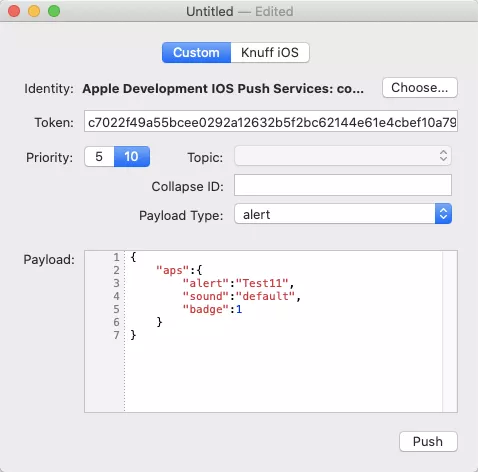
- Knuff: https://github.com/KnuffApp/Knuff
- SmartPush: https://github.com/shaojiankui/SmartPush
六、App 推送消息的处理
在 iOS10 中,UserNotifications 框架为开发者提供了 UNUserNotificationCenterDelegate 协议,开发者可以通过实现协议中的方法,在 App 接收到推送消息和用户点击推送消息时进行一些业务逻辑的处理。
无论是本地推送还是远程推送的消息,App 的运行状态都可能处于以下三种状态:
- App 正在前台运行,此时用户正在使用 App,收到推送消息时默认不会弹出消息提示框,willPresentNotification 回调方法会被调用,开发者可以从 UNNotification 对象中获取该推送消息的 payload 内容,进而获取自定义参数,然后显示一个自定义弹窗提示用户收到了新的消息;也可以在 willPresentNotification 方法中通过 completionHandler 函数的调用让推送消息直接在前台显示,用户点击前台显示的推送消息时,didReceiveNotificationResponse 回调方法也会被执行。
- App 在后台运行,此时用户点击推送消息会将 App 从后台唤醒,didReceiveNotificationResponse 回调方法会被执行,开发者可以在该方法中获得 payload,解析自定义参数并自动打开对应的页面。
- App 尚未启动,此时用户点击推送消息会打开 App,开发者可以从 launchOptions 中获取本地或远程推送消息中的自定义参数,待页面初始化完成后进行相关页面的跳转。
                              #import

                                <UserNotifications/UserNotifications.h>@interface AppDelegate ()<UNUserNotificationCenterDelegate>


                              @end


                                @implementation


                                AppDelegate


                              // 在 App 启动后就将 AppDelegate 对象配置为 NotificationCenter 的 delegate


                            - (

                              BOOL

                            )application:(

                              UIApplication

                            *)application didFinishLaunchingWithOptions:(

                              NSDictionary

                            *)launchOptions {


                            [UNUserNotificationCenter currentNotificationCenter].delegate =

                              self

                            ;


                              // NSDictionary *localNotification = [launchOptions valueForKey:UIApplicationLaunchOptionsLocalNotificationKey];


                              NSDictionary

                            *remoteNotification = [launchOptions valueForKey:

                              UIApplicationLaunchOptionsRemoteNotificationKey

                            ];


                              if

                            (remoteNotification){


                              //app 已退出,点击拉起了 app


                              NSDictionary

                            *params = userInfo[

                              @"userInfo"

                            ];


                              // 此时 NavigationController 还未初始化,可以先暂存参数,稍后跳转


                            [PageSwitch handlePushSwitch:params];


                            }


                            }


                              // 用户点击推送消息的回调


                            - (

                              void

                            )userNotificationCenter:(UNUserNotificationCenter *)center didReceiveNotificationResponse:(UNNotificationResponse
                            *)response withCompletionHandler:(

                              void

                            (^)(

                              void

                            ))completionHandler API_AVAILABLE(ios(

                              10.0

                            )){


                            UNNotification *noti = ((UNNotificationResponse *)response).notification;


                              NSDictionary

                            *userInfo = noti.request.content.userInfo;


                              NSDictionary

                            *params = userInfo[

                              @"userInfo"

                            ];


                              // 根据消息推送中的参数,在用户点击推送时自动进行跳转


                            [PageSwitch handlePushSwitch:params];


                            }


                              //App 在前台运行时收到推送消息的回调


                            - (

                              void

                            )userNotificationCenter:(UNUserNotificationCenter *)center willPresentNotification:(

                              nonnull

                            UNNotification *)notification withCompletionHandler:(

                              nonnull


                              void

                            (^)(UNNotificationPresentationOptions))completionHandler API_AVAILABLE(ios(

                              10.0

                            )){


                              // 可以让 App 在前台运行时也能收到推送消息


                            completionHandler(UNNotificationPresentationOptionBadge|UNNotificationPresentationOptionAlert);


                            }
在 iOS9 中,UIApplication 提供了下面三个消息推送的处理方法,分别是远程消息推送、远程静默推送和本地消息推送的回调处理方法。
前两个回调方法都能够用于 App 远程消息推送的处理,同时使用时只有远程静默推送方法会被调用,当 payload 包含参数 content-available=1 时,该推送就是静默推送,静默推送不会显示任何推送消息,当 App 在后台挂起时,静默推送的回调方法会被执行,开发者有 30s 的时间内在该回调方法中处理一些业务逻辑,并在处理完成后调用 fetchCompletionHandler。
                              // 远程消息推送回调方法,ios(3.0, 10.0)


                              -

                            (void)

                              application


                              :(UIApplication

                            *)

                              application


                              didReceiveRemoteNotification


                              :(NSDictionary

                            *)

                              userInfo

                            ;


                              // 远程静默推送回调方法,ios(7.0, *)


                              -

                            (void)

                              application


                              :(UIApplication

                            *)

                              application


                              didReceiveRemoteNotification


                              :(NSDictionary

                            *)

                              userInfo


                              fetchCompletionHandler


                              :(void

                            (^)(UIBackgroundFetchResult result))

                              completionHandler


                              API_AVAILABLE

                            (ios(

                              7.0

                            ));


                              // 本地消息推送回调方法,ios(4.0, 10.0)


                              -

                            (void)

                              application


                              :(UIApplication

                            *)

                              application


                              didReceiveLocalNotification


                              :(UILocalNotification

                            *)

                              notification

                            ;
UIApplication 中的这三个方法在以下两种场景下都会被调用:
- App 在前台运行时收到通知;
- App 在后台运行时用户点击推送消息拉起 App。
区别是前两种方法对应远程消息推送的接收和点击触发响应,didReceiveLocalNotification 用于本地消息推送。我们可以通过 UIApplication 的 applicationState 属性来判断 App 是否在前台运行,然后分别实现:
- 用户点击消息唤起后台 App 并打开对应页面;
- 用户前台使用 App 时显示自定义弹窗。
                            - (

                              void

                            )application:(

                              UIApplication

                            *)application didReceiveRemoteNotification:(

                              NSDictionary

                            *)userInfo{


                              if

                            ([

                              UIApplication

                            sharedApplication].applicationState ==

                              UIApplicationStateActive

                            ){


                              NSLog

                            (

                              @" 在前台,%@"

                            ,userInfo);


                            }

                              else

                            {


                              NSLog

                            (

                              @" 从后台进入前台,%@"

                            ,userInfo);


                              NSDictionary

                            *params = userInfo[

                              @"userInfo"

                            ];


                              if

                            ([Tools isValidString:params[

                              @"url"

                            ]]){


                              NSString

                            *routeUrl = params[

                              @"url"

                            ];


                            [PageSwitch handlePushSwitch:params];


                            }


                            }


                            }
七、结语
本文首先介绍了消息推送相关的工程配置和推送权限的申请,然后分别介绍了本地和远程消息推送的不同使用场景和实现方法,最后介绍了 App 在收到推送消息后的相关回调方法和处理逻辑。
在实际的项目开发中,我们往往会选择腾讯云推送或极光推送等更加成熟的第三方消息推送平台,这些平台都提供了相对完善的推送和数据统计服务,通过接口和 SDK 屏蔽了底层逻辑的实现,通过对 iOS 消息推送的实现过程的了解也能够帮助我们更好的使用这些平台。
由于时间的关系,自己的研究并不深入,如有疏漏和错误,欢迎留言指正交流~
参考资料 :
[1] 腾讯云的 TPNS 文档:
[2] 苹果官方技术文档:
https://developer.apple.com/documentation/usernotifications
[3] 史上最全 iOS Push 技术详解:
https://cloud.tencent.com/developer/article/1198303
[4] iOS 远程推送 -APNs 详解:
https://juejin.im/post/6844903893592178696
[5] iOS 静默推送进阶知识:
https://www.jianshu.com/p/c211bd295d58
[6] iOS10 自定义通知 UI:
https://www.jianshu.com/p/85ac47bdf387
[7] 信鸽文档 - 推送服务介绍:
https://xg.qq.com/docs/ios_access/ios_push_introduction.html
[8] 浅谈 iOS 和 Android 后台实时消息推送的原理和区别:
https://cloud.tencent.com/developer/article/1150967
[9] 浅谈基于 HTTP2 推送消息到 APNs:
http://www.linkedkeeper.com/167.html
[10] PHP 基于 socket 的 ios
推送的实现:
https://www.fzb.me/2015-9-7-sockect-implement-for-apns.html
[11] 如何构建一套高可用的移动消息推送平台:
https://www.infoq.cn/article/HA-mobile-message-push-platform
本文转载自公众号云加社区(ID:QcloudCommunity)。
原文链接 :


