从 AWS/Azure 迁移 VM 到 GCP 到 GCE,可以采用 Google 到 VM 迁移工具 Velostrata,具体到迁移拓扑结构如下,以 AWS 为例:
一 创建 VPN 连接
具体创建请参考
本文以 AWS 为例,创建 AWS - GCP 到 VPN 隧道。
1 配置 AWS
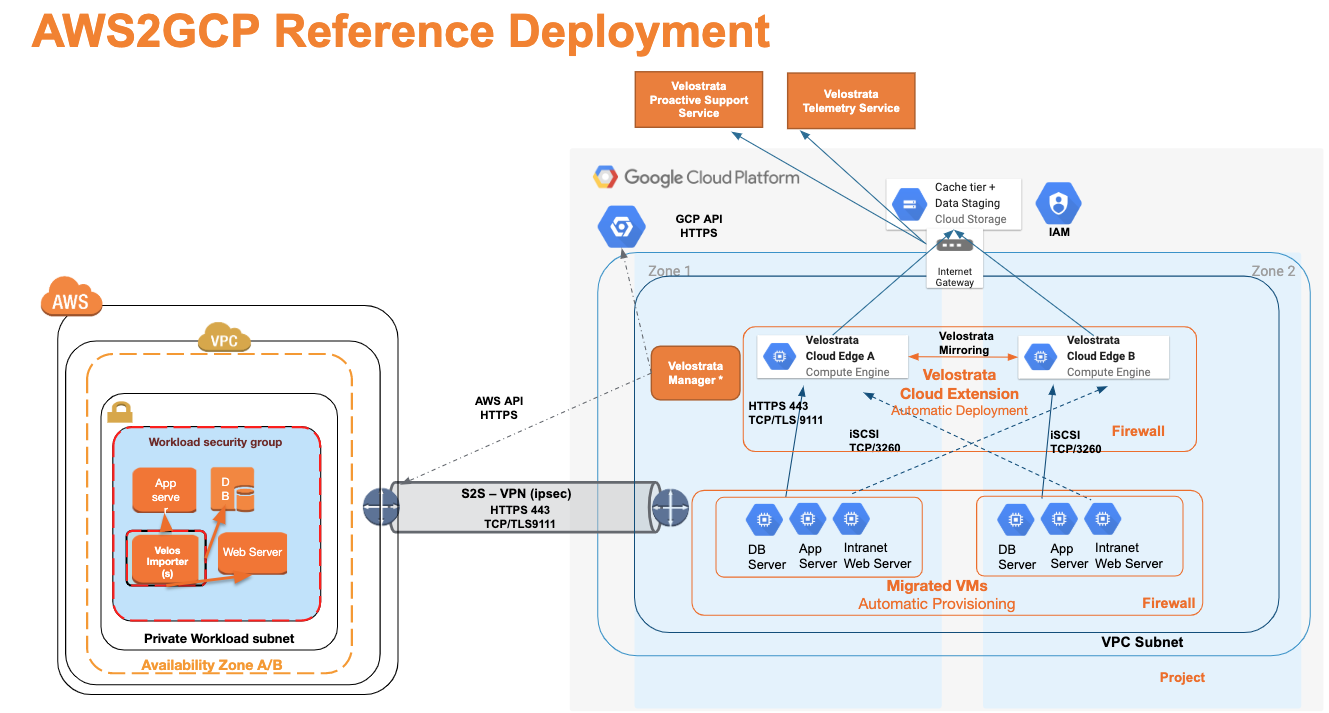
A 创建 Customer Gateway
在 VPC 中创建 Customer Gateway
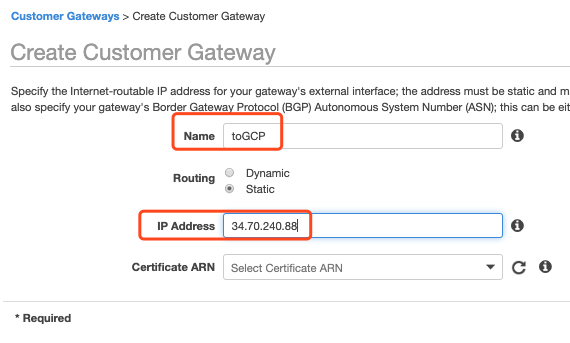
B 创建 Virtual Private Gateway
在 VPC 中创建 Virtual Private Gateway
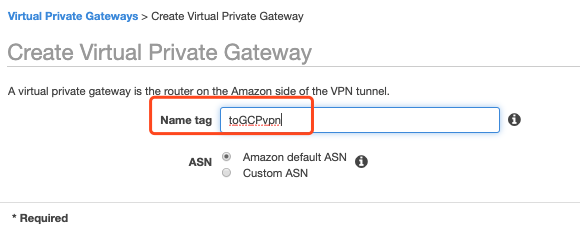
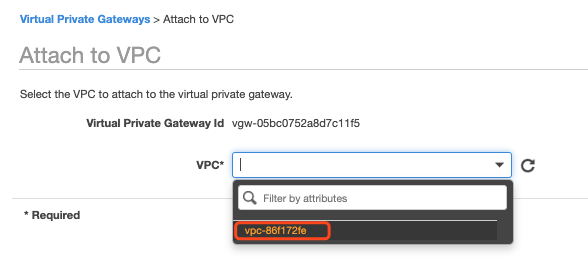
创建好后,把这个 Virtual Private Gateway attach 到一个 VPC 上:

C 创建 VPN Connection
VPN Connection,只需要创建一根即可,当然也可以创建 HA 模式,这里以单根为例子。
根据已有的参数,填入创建的参数中:
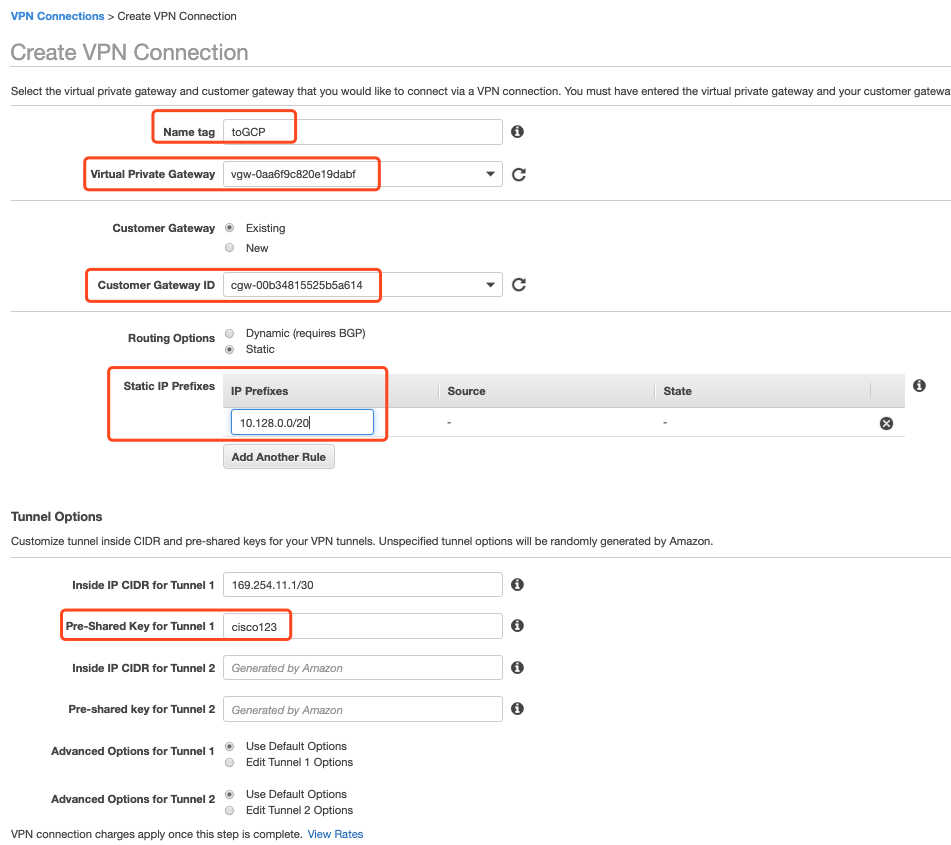
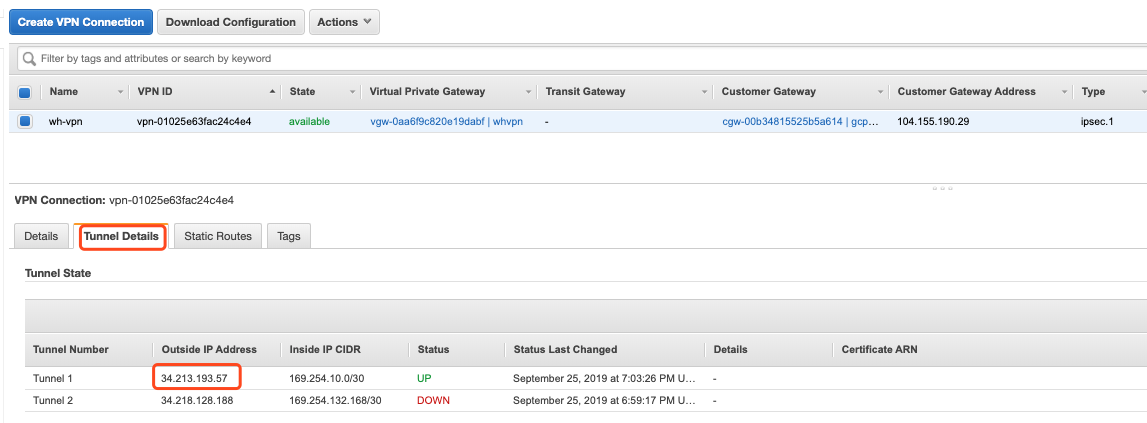
成功后,在 Tunnel Detail 中可以看到相应的 IP 地址:
4 VPC 内部添加路由

这样 AWS 侧就配置好了。
2 配置 GCP
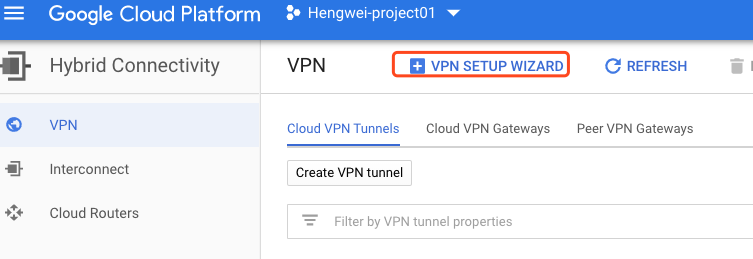
在 GCP console 中选择 Hybrid Connectivity,选择 VPN,点击 VPN SETUP WIZARD:
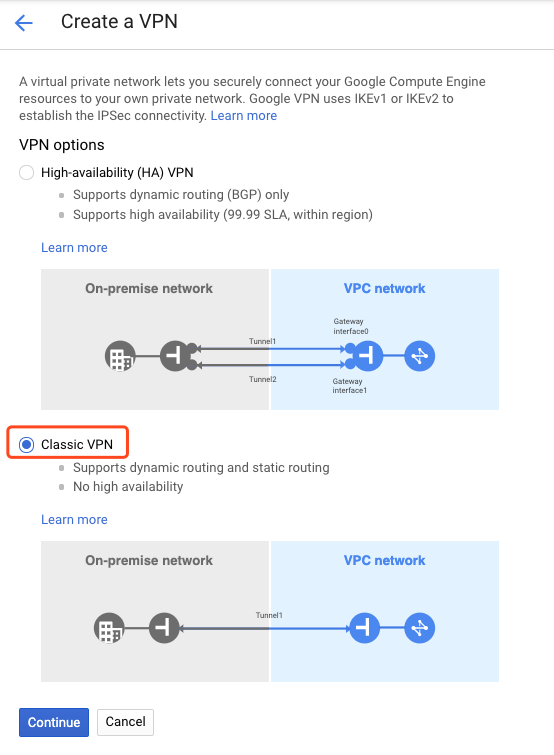
选择 Classic VPN 模式:
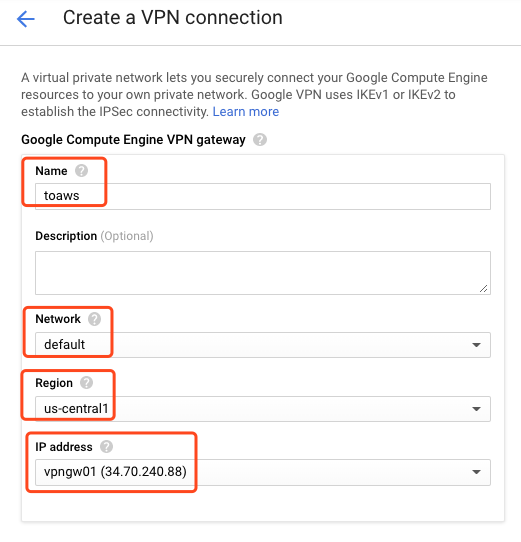
GW 的相关信息,其中 IP 地址是 AWS 创建 Customer Gateway 中需要的地址:
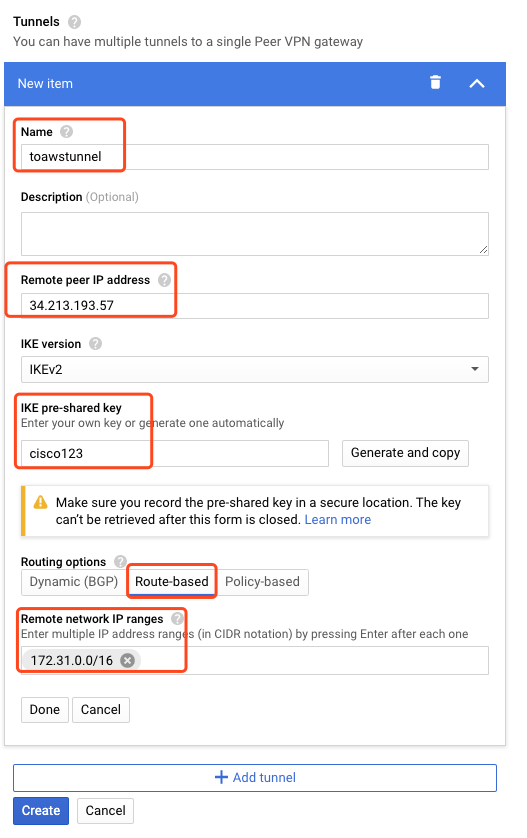
Tunnel 相关配置:
3 检查状态
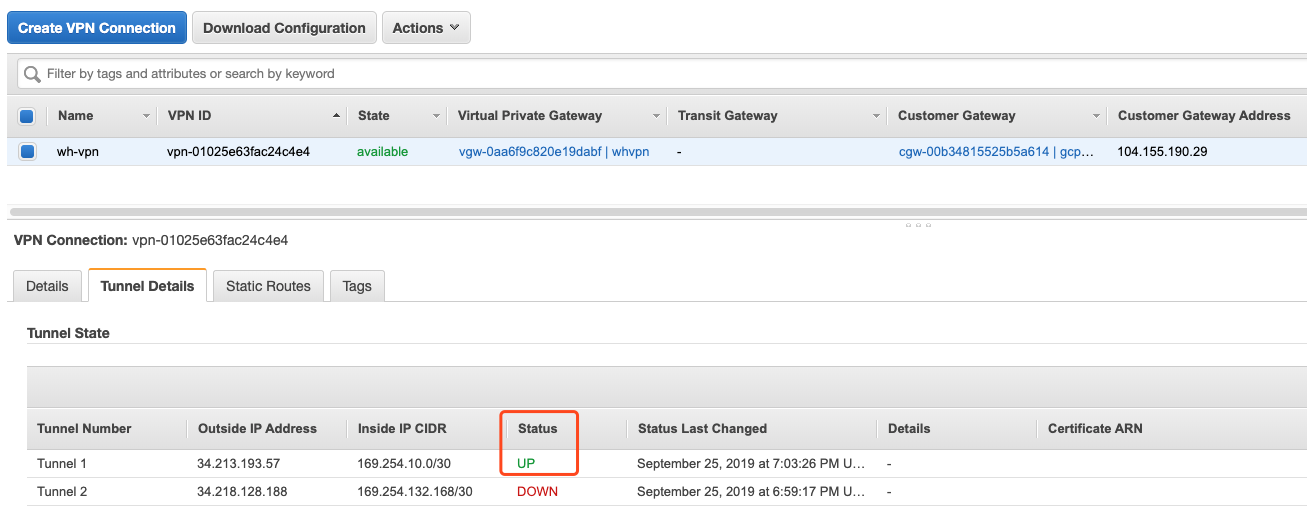
在 AWS 和 GCP 的 Console 中检查 VPN 状态:
AWS 侧:
GCP 侧:

需要两边各创建一台 VM,互相 Ping,看是否可以通。
二 创建配置 Velostrata 管理 VM
1 创建 GCP 迁移的 Service Account
在创建 Velostrata 的管理 VM 之前,需要在 GCP 上创建相应的用户和权限。
首先在 GCP 的 Console 中,进入 Cloud Shell 模式,点击有上角 Cloud Shell 的图标:

进入 Velostrata 目录:
cd /google/velostrata
运行脚本:
./velostrata_sa_roles.py -p hengwei-project01 -d wh

创建了两个 Role 和两个 Service Account。
其中 Service Account 为:
velos-manager-wh@hengwei-project01.iam.gserviceaccount.com
velos-cloud-extension-wh@hengwei-project01.iam.gserviceaccount.com
后面创建 VM 的时候需要用到。
2 创建 VM
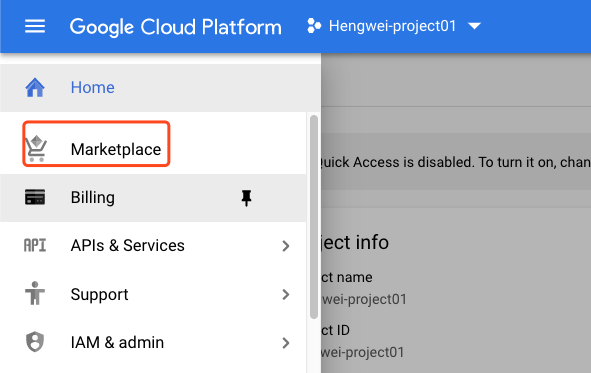
在 Marketplace 中创建相关资源:
搜索 VM Migration:
选择 Velostrata。
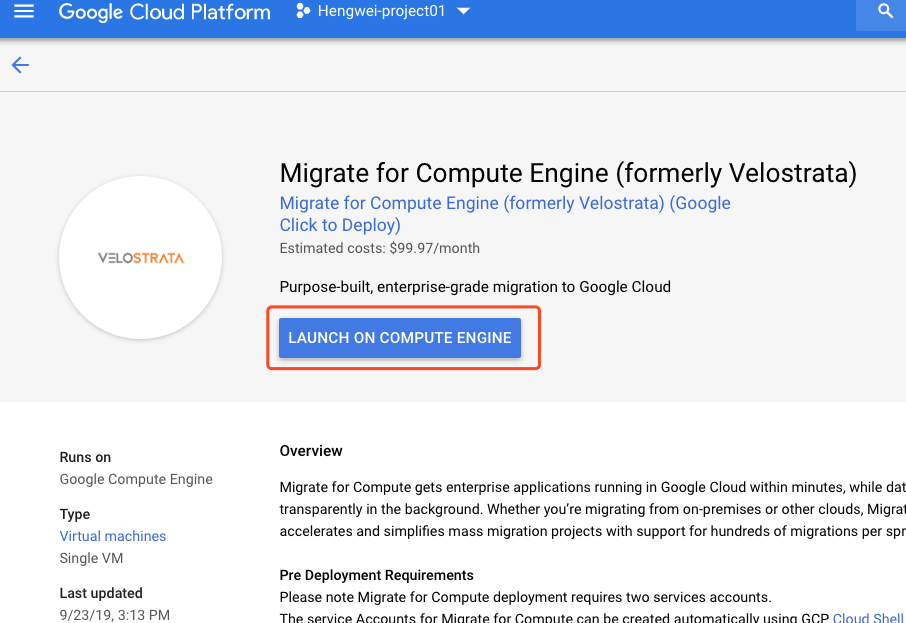
填写相关的内容,其中 Service Account,采用刚刚创建的 2 个 Service Account。:
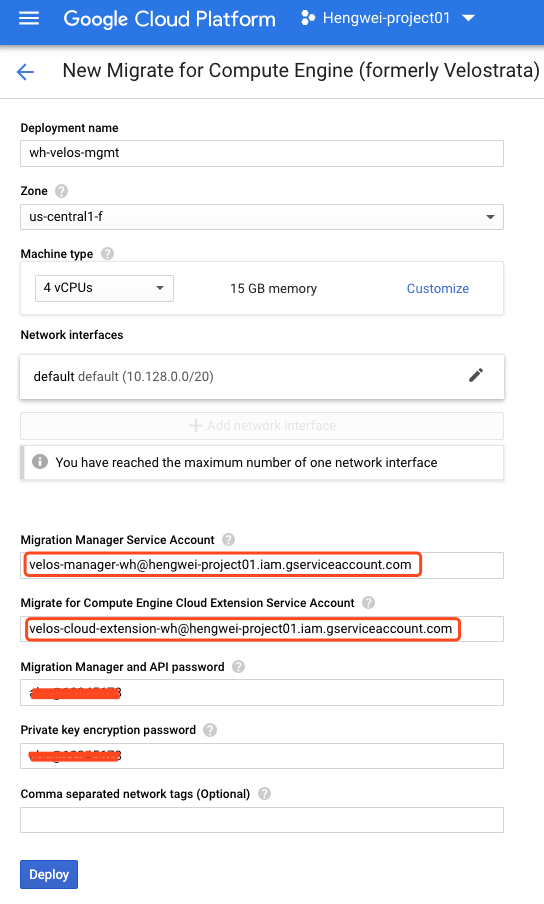
点击部署后,可以看到部署成功:
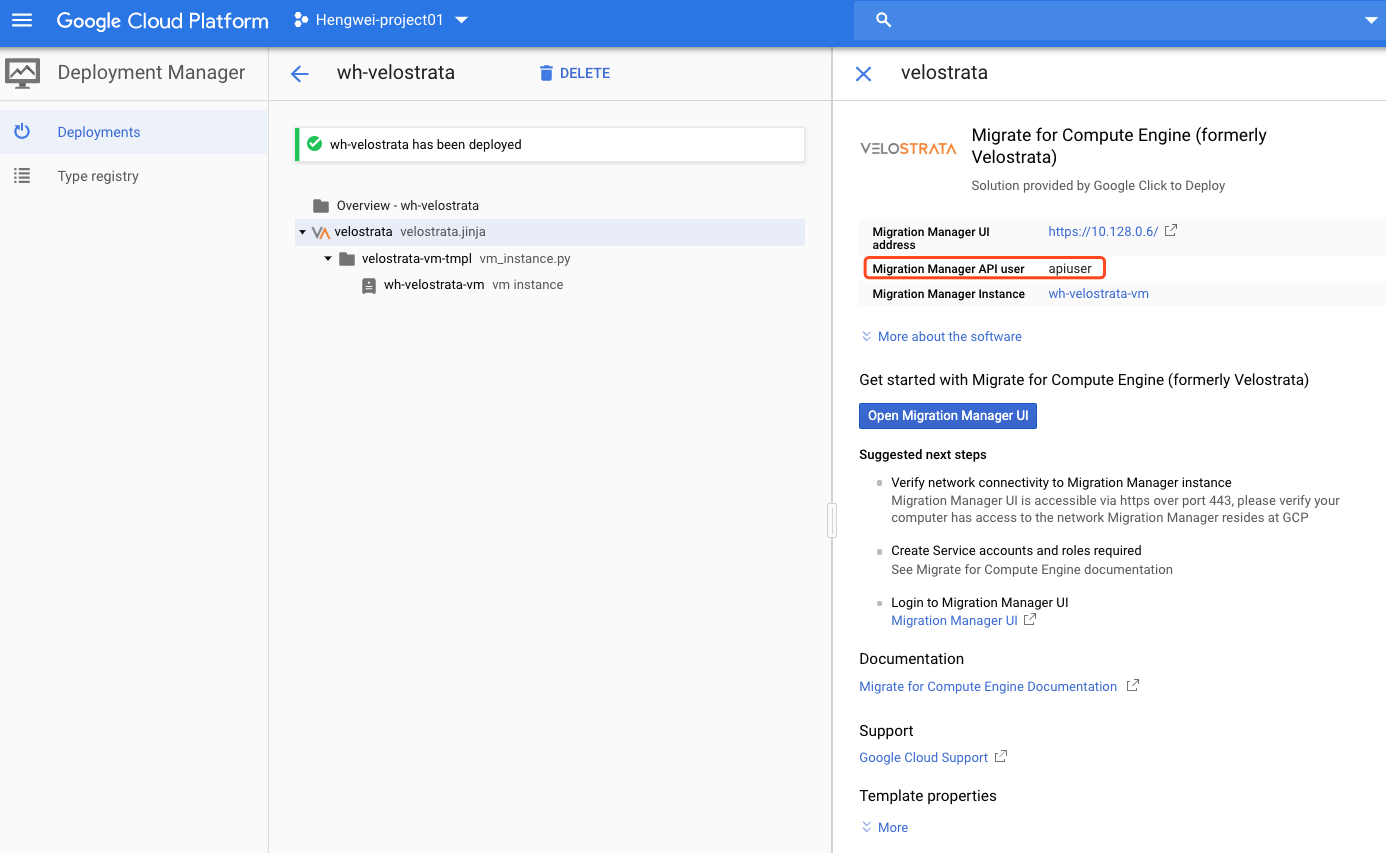
返回 GCE 的 Console 界面,查看 VM 的 Public IP 地址:

访问
选择 enable Stackdriver。
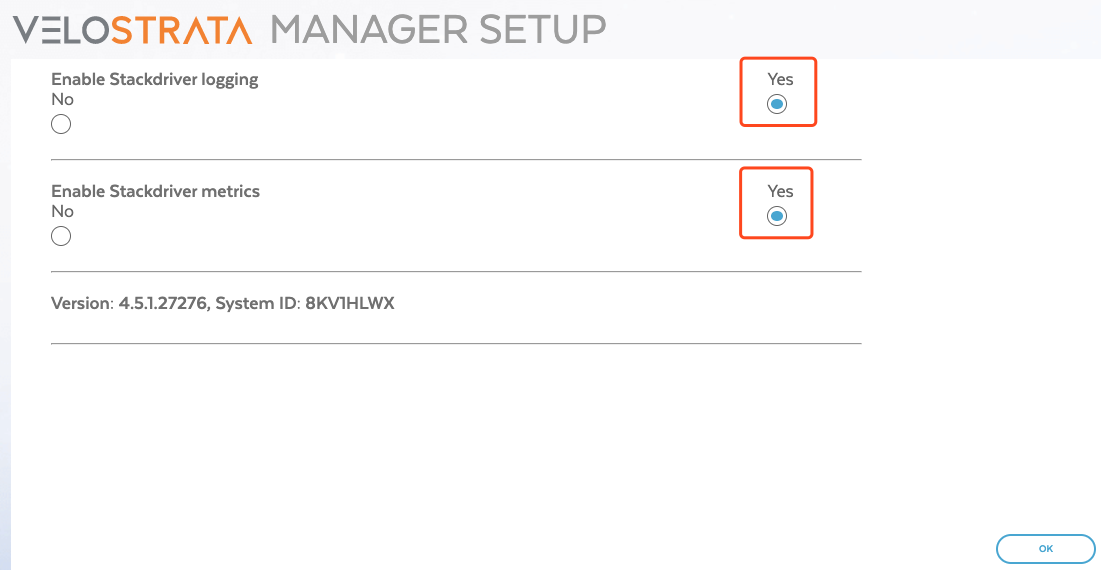
登陆的用户名密码如下:
用户名是:apiuser
密码是:部署中定义的密码
三 准备 AWS 上的 VM
1 相关文档
需要迁移的 VM 中需要安装 Velostrata 的插件,用于实现 streaming 的迁移。具体文档如下
包含各种操作系统的说明。
2 在 VM 中安装插件
如果采用的是 CentOS,只需要采用如下的 D、E 两步。
如果采用的是 AWS 的 Amazon Linux 2,采用如下 A-E,共 5 步:
A 准备 YUM Repo 环境
rpm --import https://www.elrepo.org/RPM-GPG-KEY-elrepo.org vim /etc/yum.repos.d/elrepo.repo [elrepo-kernel] name=ELRepo.org Community Enterprise Linux Kernel Repository - el7 baseurl=http://elrepo.org/linux/kernel/el7/$basearch/ http://mirrors.coreix.net/elrepo/kernel/el7/$basearch/ http://mirror.rackspace.com/elrepo/kernel/el7/$basearch/ http://repos.lax-noc.com/elrepo/kernel/el7/$basearch/ http://mirror.ventraip.net.au/elrepo/kernel/el7/$basearch/ mirrorlist=http://mirrors.elrepo.org/mirrors-elrepo-kernel.el7 enabled=1 gpgcheck=1 gpgkey=file:///etc/pki/rpm-gpg/RPM-GPG-KEY-elrepo.org protect=0 Update yum: yum update
B 安装 kernel-ml
yum --disablerepo="*" --enablerepo="elrepo-kernel" list available yum --enablerepo=elrepo-kernel install kernel-ml
安装完成后,重启 VM。
C 配置 GRUB2
在 /etc/default/grub 中添加
GRUB_DEFAULT=0
运行下面命令生成配置:
grub2-mkconfig -o /boot/grub2/grub.cfg
生成配置后,重启 VM
D 下载软件
wget
E 用 Yum 安装
yum install velostrata-prep-2.1-7.redhat.x86_64.rpm
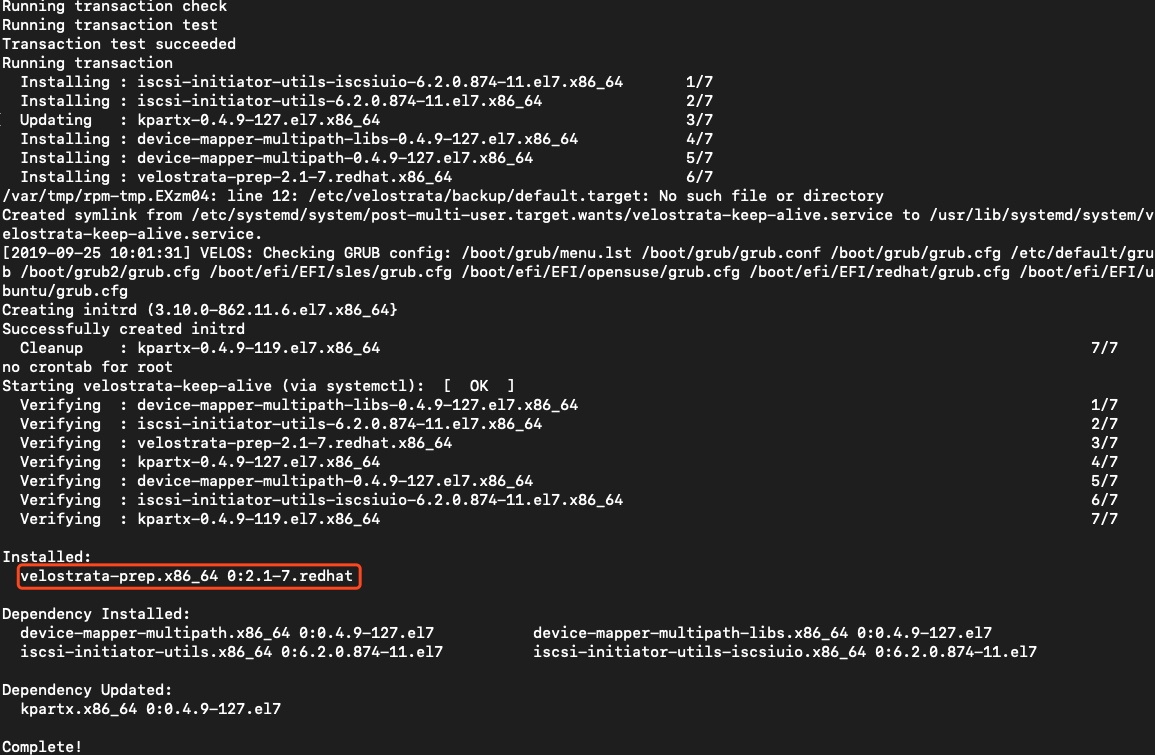
安装成功。
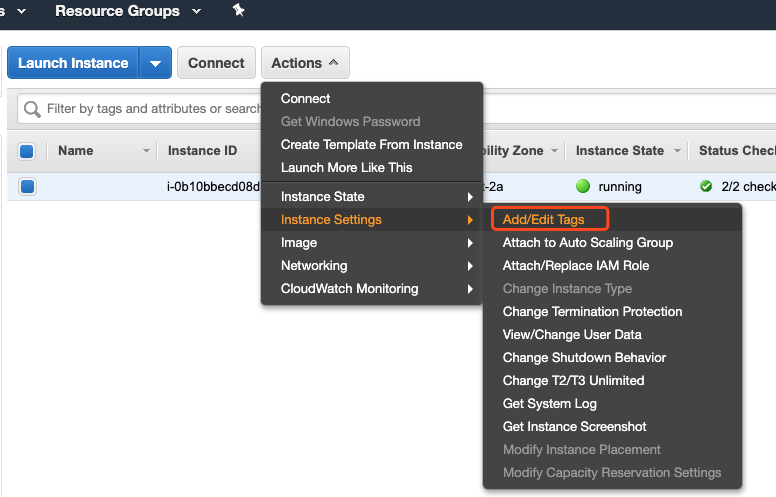
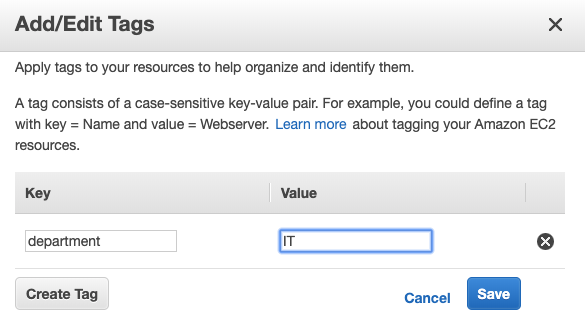
3 Tag VM
Velostrata 要求根据 AWS 的 Tag 进行迁移,需要对 AWS 的 VM 进行 Tag:
四 使用迁移工具
1 配置 Source Cloud
Velostrata 支持 AWS 或者微软作为 Source,这里以 AWS 为例子:
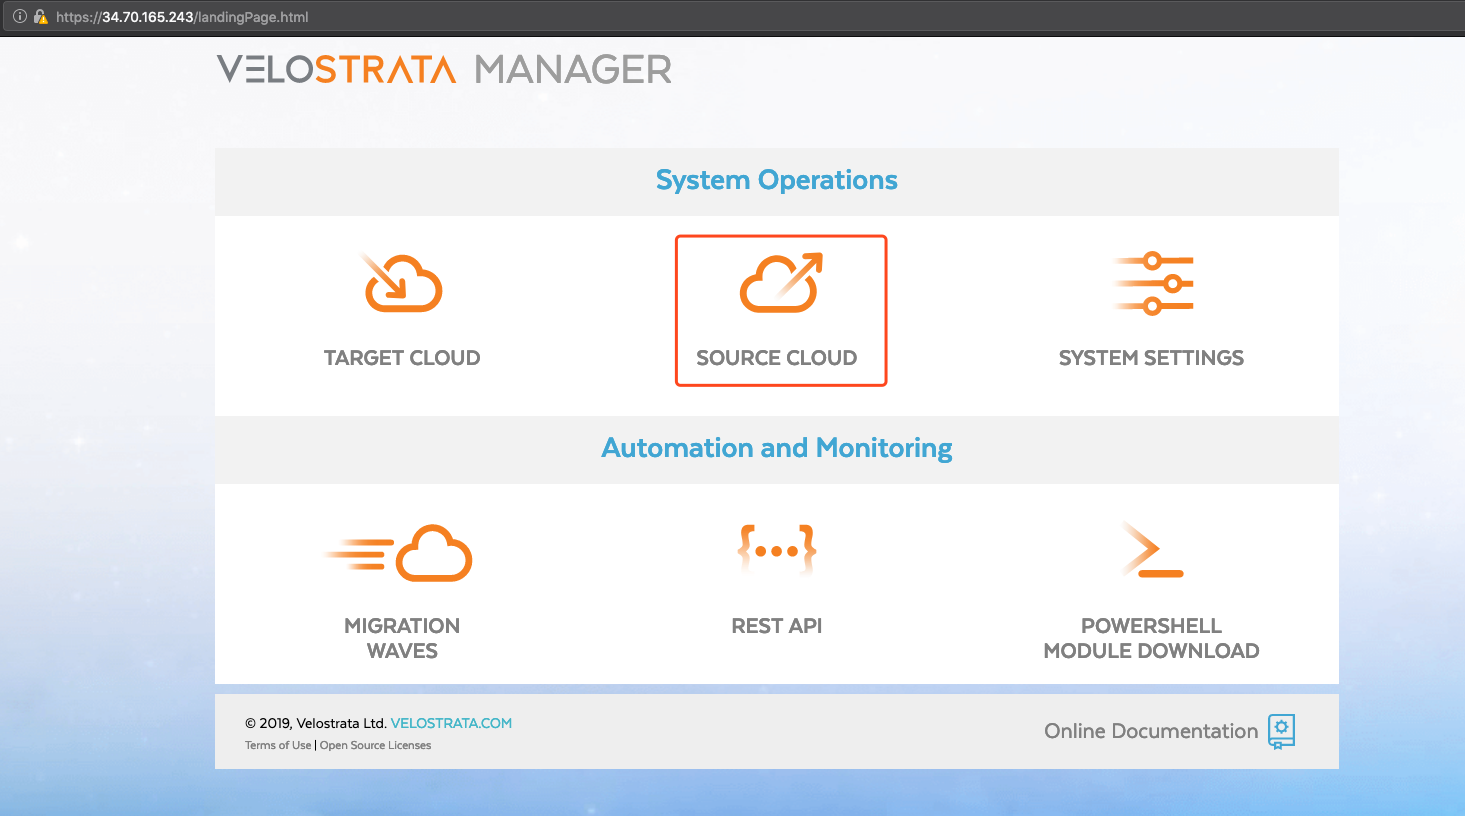
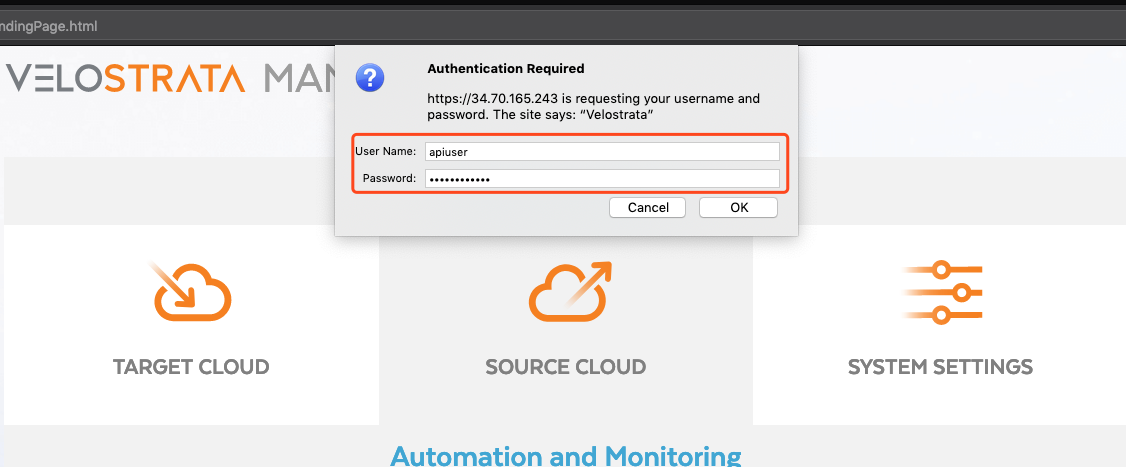
如果提示用户名密码:
用户名是:apiuser
密码是:部署中定义的密码
A 创建 Cloud Credentials
在创建 Cloud Credentials 前,需要在相应的 AWS 或 Azure 上创建相应的 Role。这里以 AWS 为例。
1 AWS 配置
a 配置 IAM
迁移前,需要在 AWS 中配置相应的 IAM 权限,Google 已经准备好了相应的配置文件
选择 CloudFormation Stack。下载后,可以获得一个 Json 文件。
在 CloudFormation 中上传 Velostrata 的配置文件:
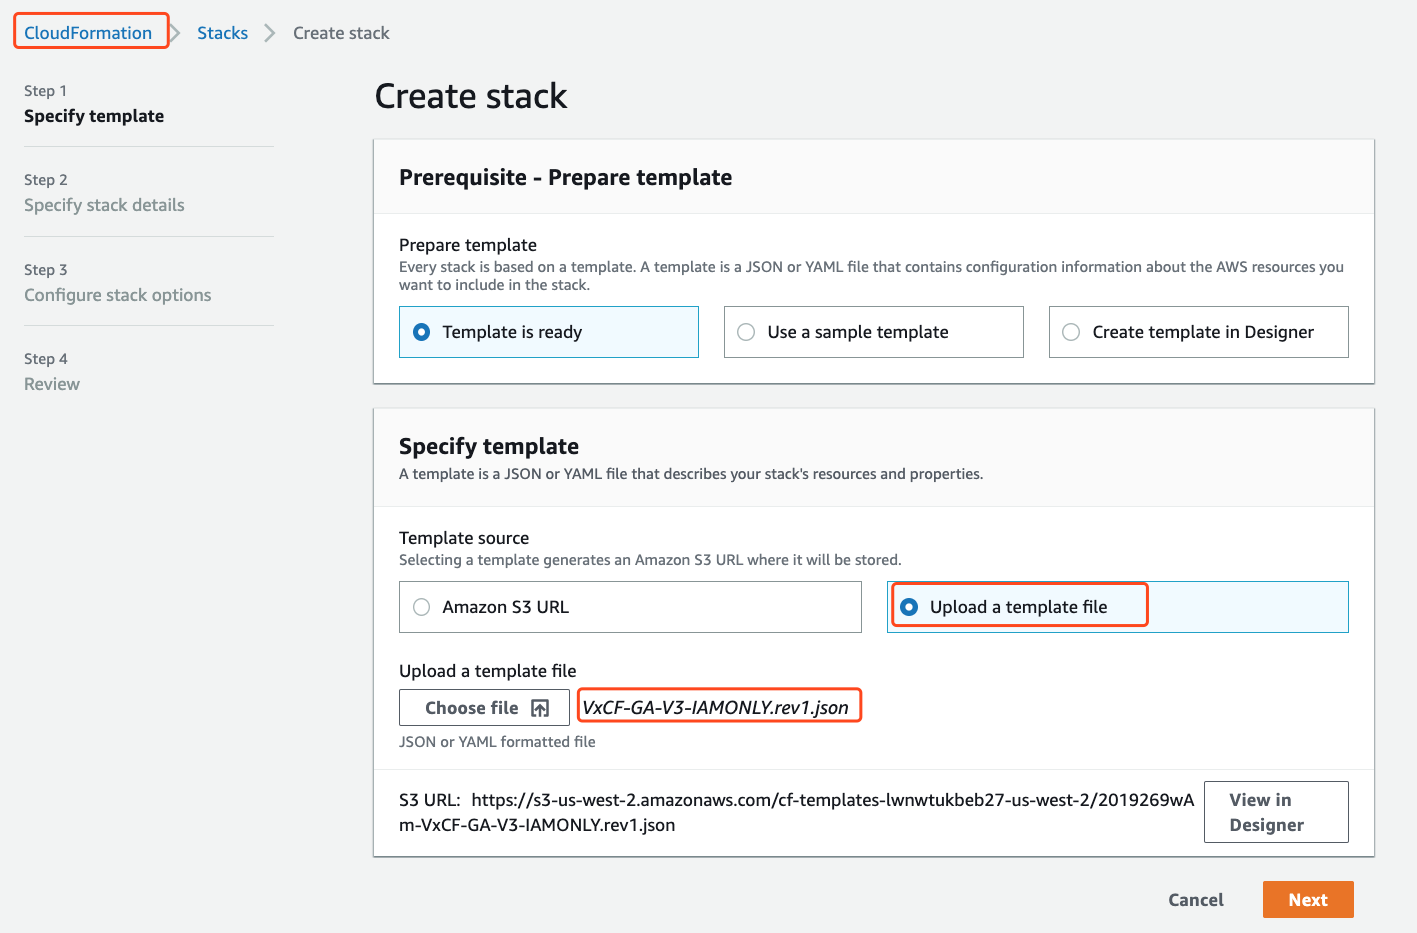
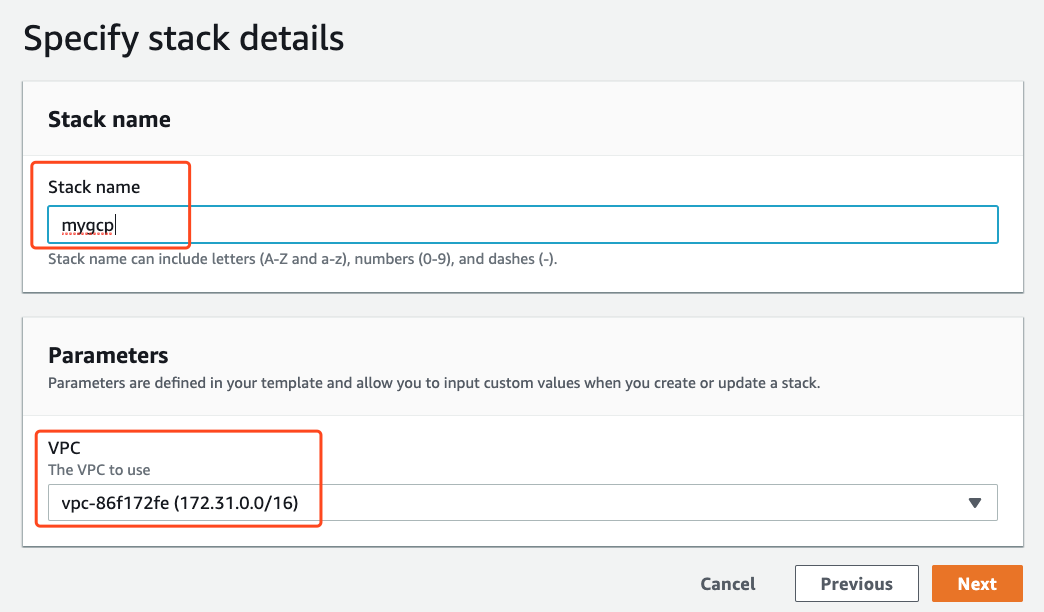
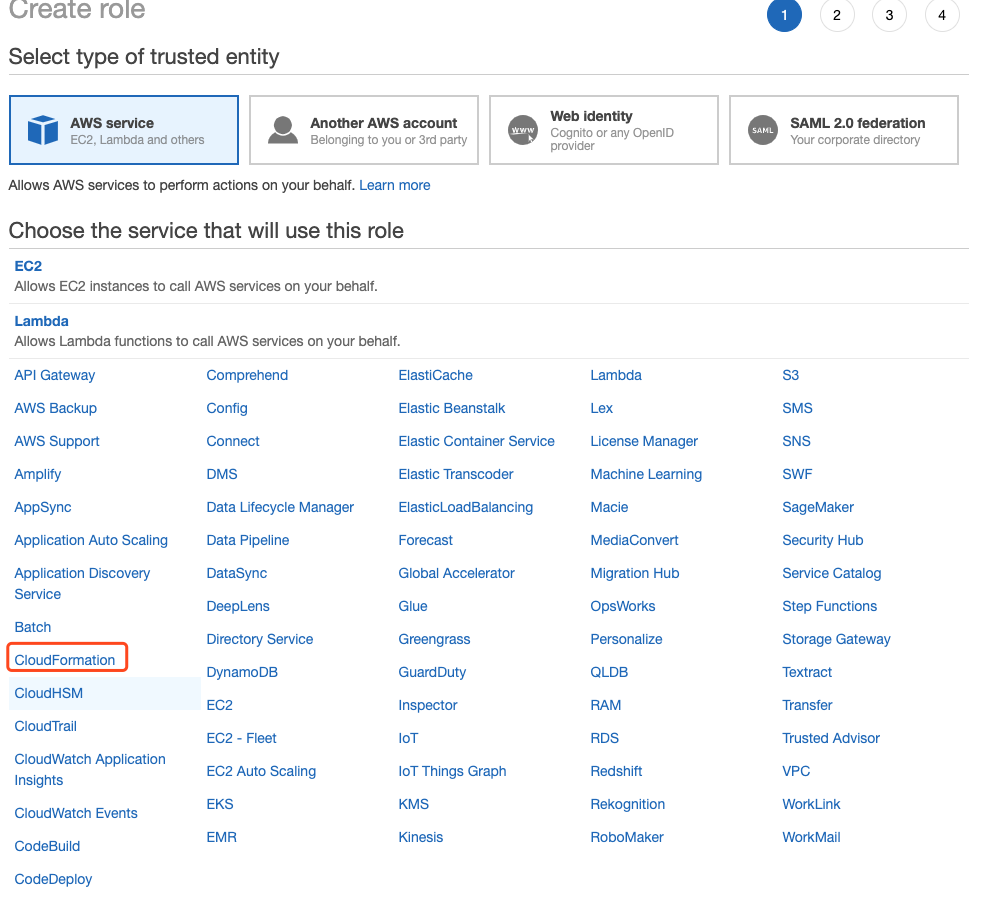
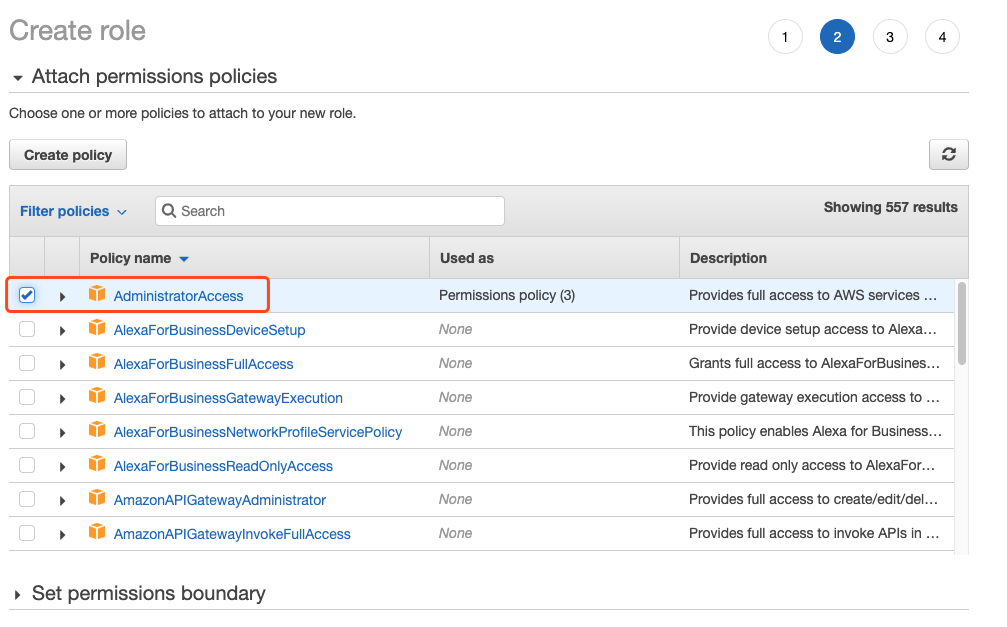
在 IAM Role 的选择中,需要事先创建一个 Role,用于 CloudFormation,权限是所有的 Service:
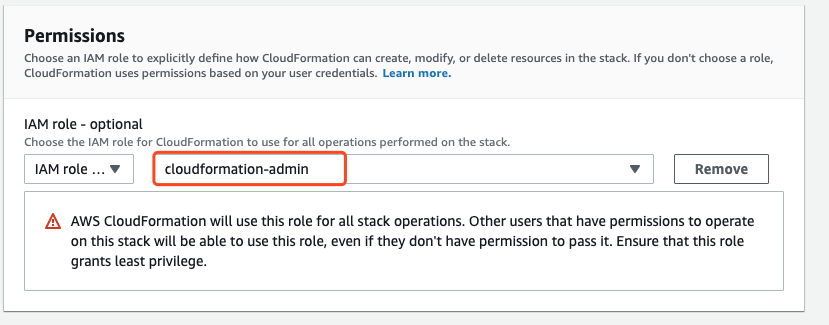
创建 Role 的过程:

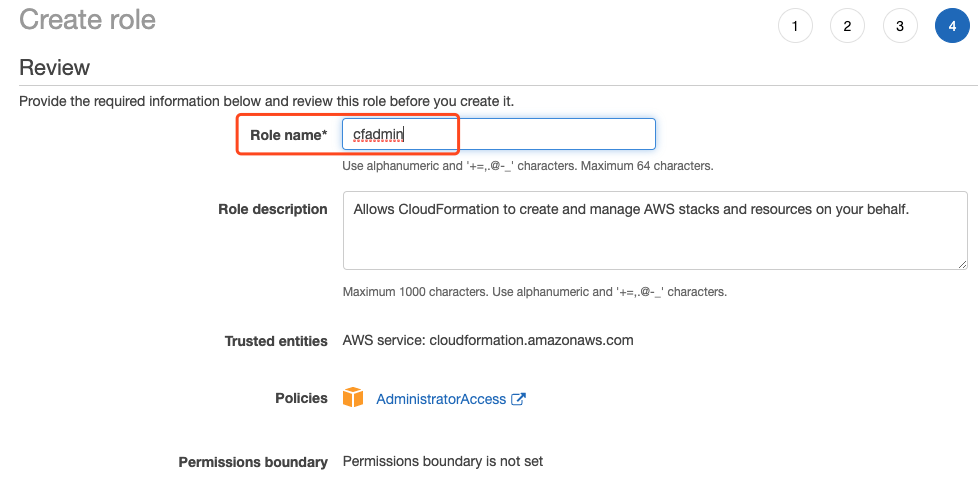
IAM 中创建用户:
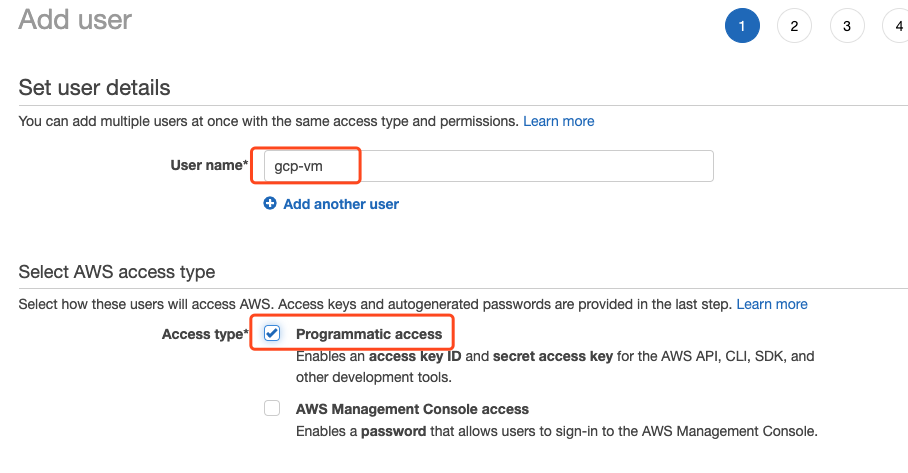
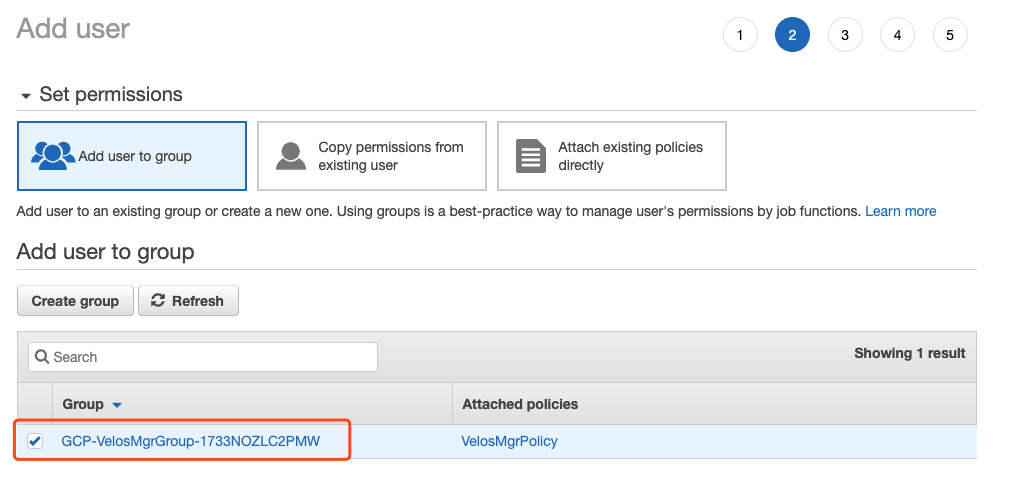
创建成功后,会得到 Access Key 和 Secret Key

b 创建 Cloud Credentials

AWS 中采用的是 Access Key+Secret Key 的方式:
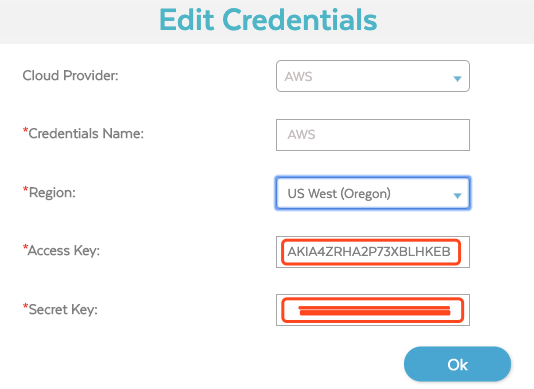
2 Azure 配置
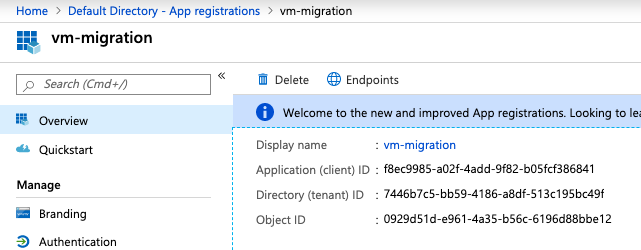
相似的,Azure 中需要创建 App Registration,可以提供的信息包括:
Subscription ID,Tenant ID,Application ID 和 Client Secret 四个部分。
这些信息需要在 Azure AD 的 App Registrations 中创建一个 registration 后获得。
a 查看相关信息
Subscription ID 在 Subscriptions-> Overview 查看:

在 Azure AD -> App Registration -> $ARName -> Overview 查看 application ID 和 Tenant ID:
在 Azure AD -> App Registration -> $ARName -> Certificates & secrets 中生成和查看 Secrets
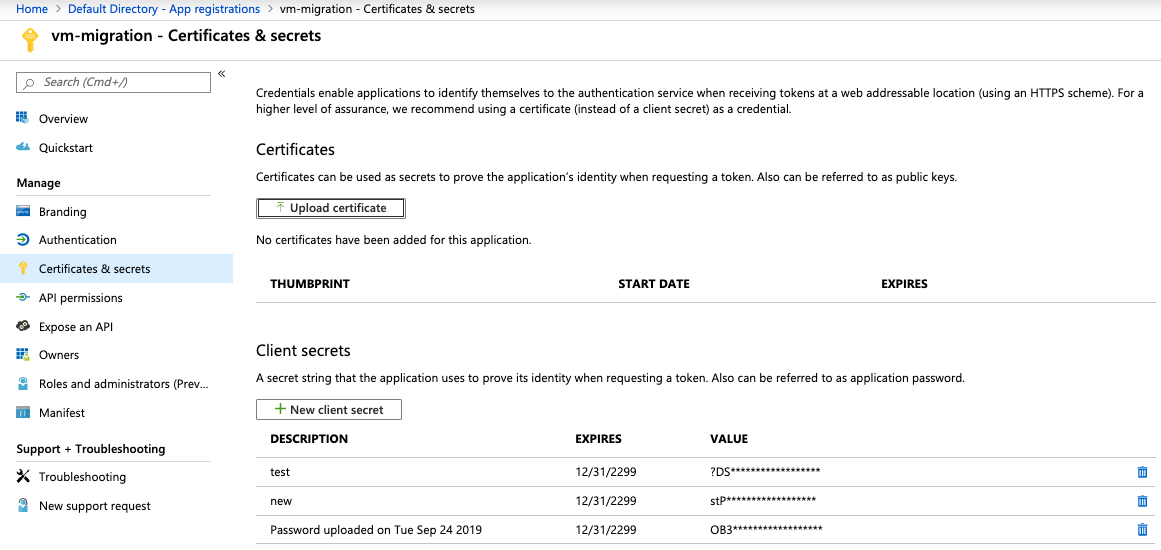
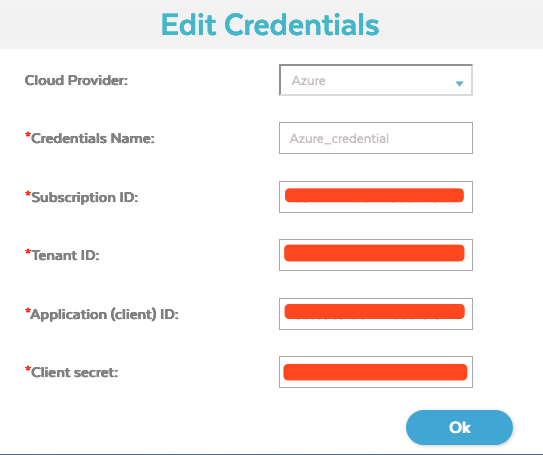
b 创建 Cloud Credentials
相关信息填写到 cloud credentials 中:
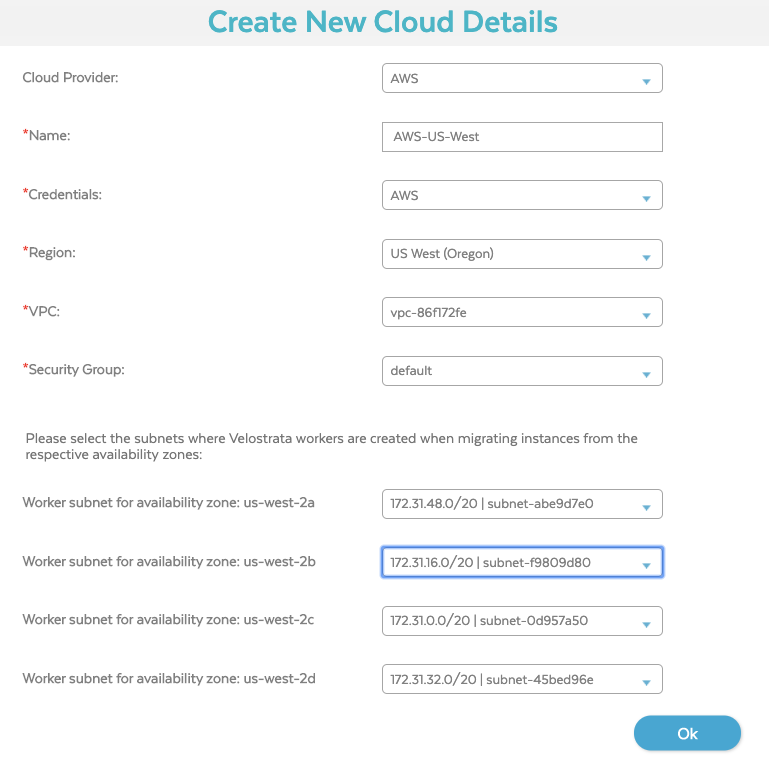
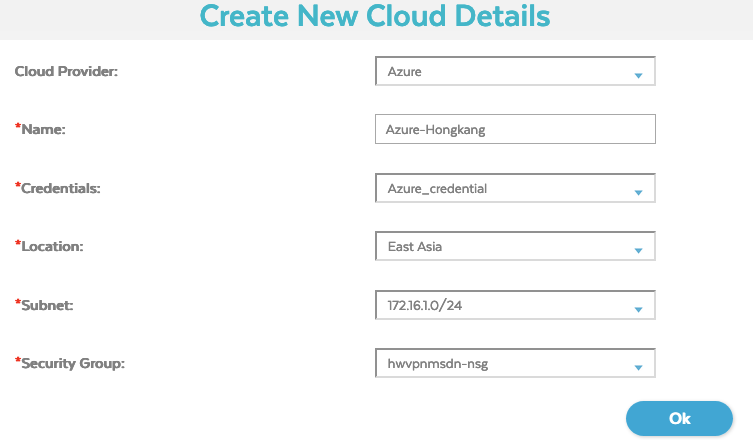
B 创建 Cloud Details
创建 Cloud Details,AWS 的配置:
Azure 的配置:
至此,Source Cloud 的内容配置完成
2 创建 Target Cloud
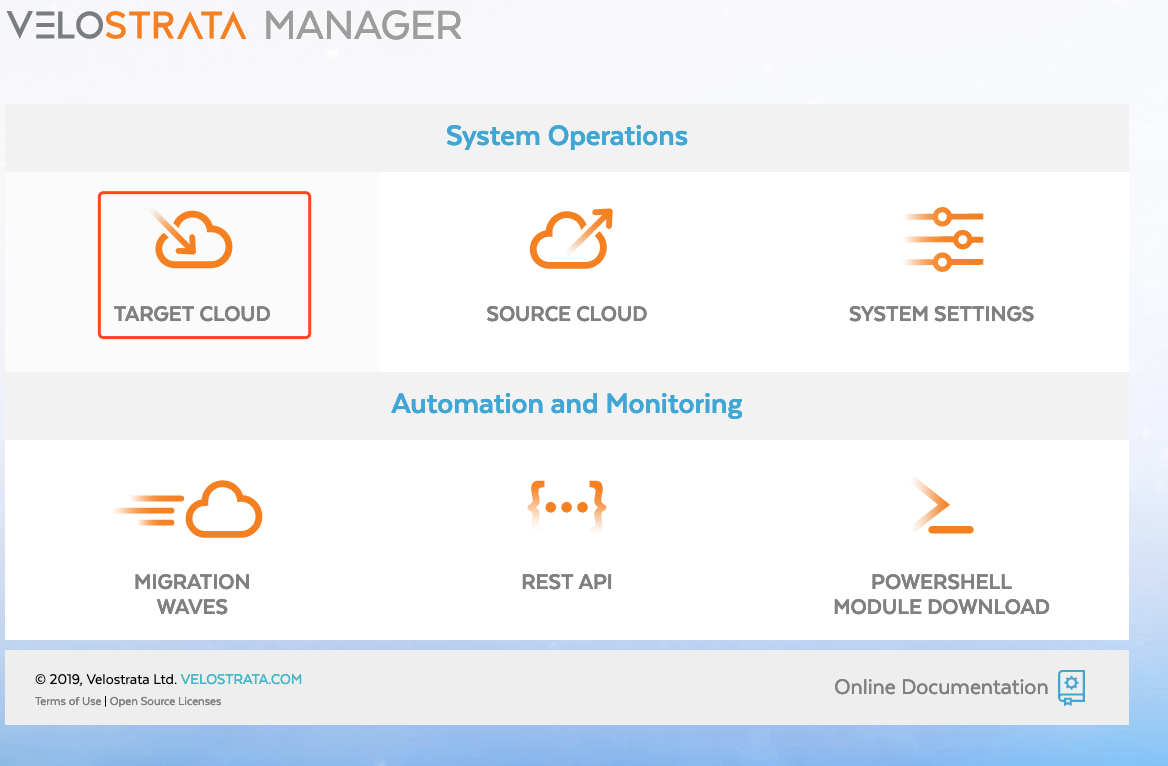
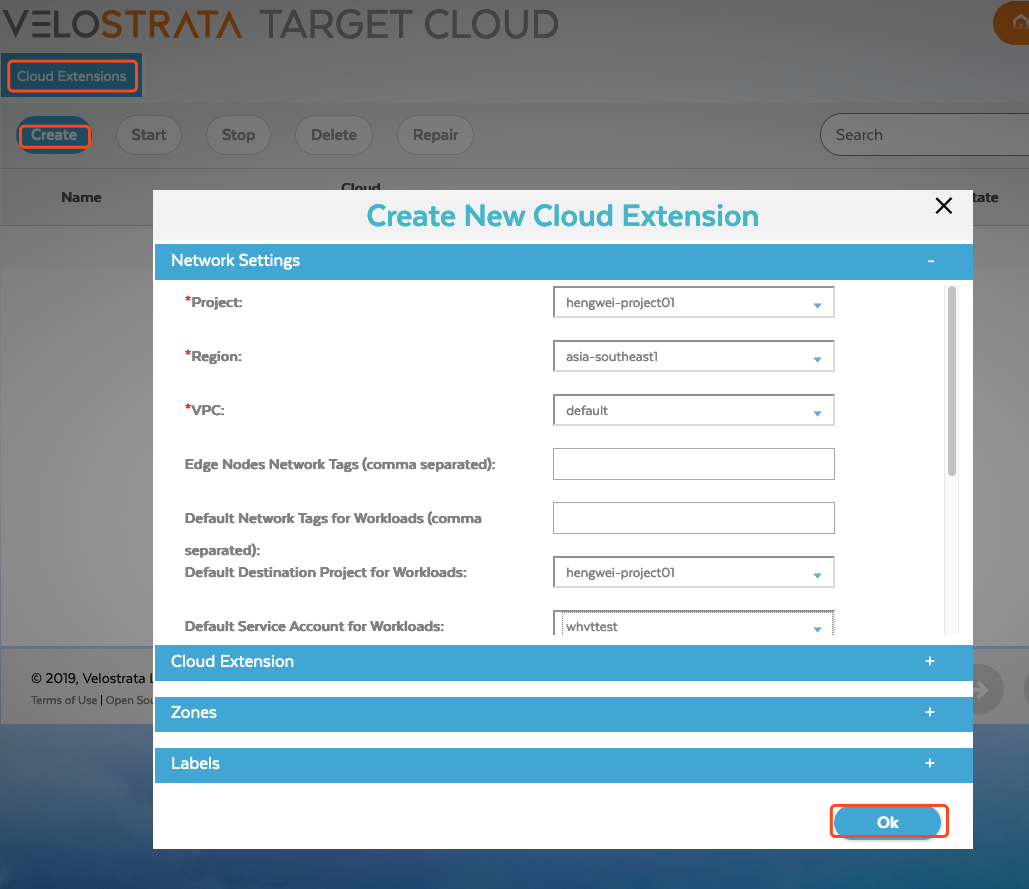
填写 GCP 的相关信息
A Network Settings:
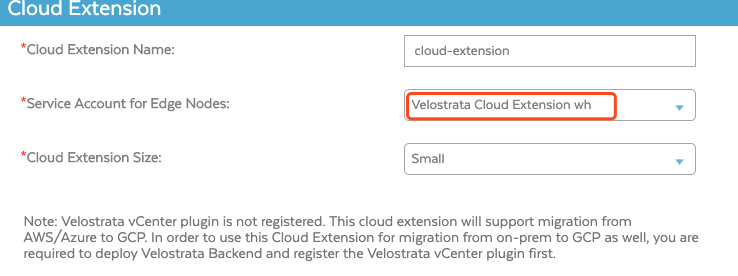
B Cloud Extension,Service Account 选择 velos-cloud-extension-wh@hengwei-project01.iam.gserviceaccount.com:
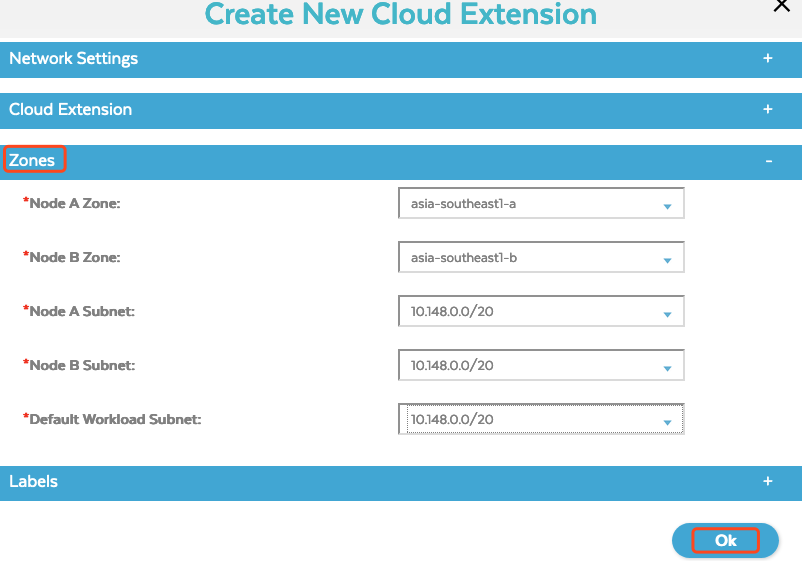
C Zones:
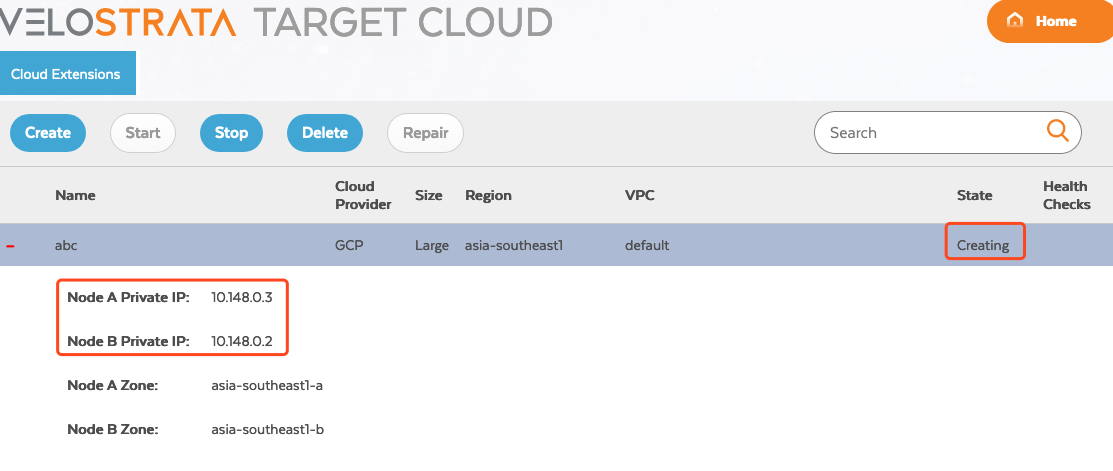
填写完成后,可以看到,正在创建 GCP 的 Extend:
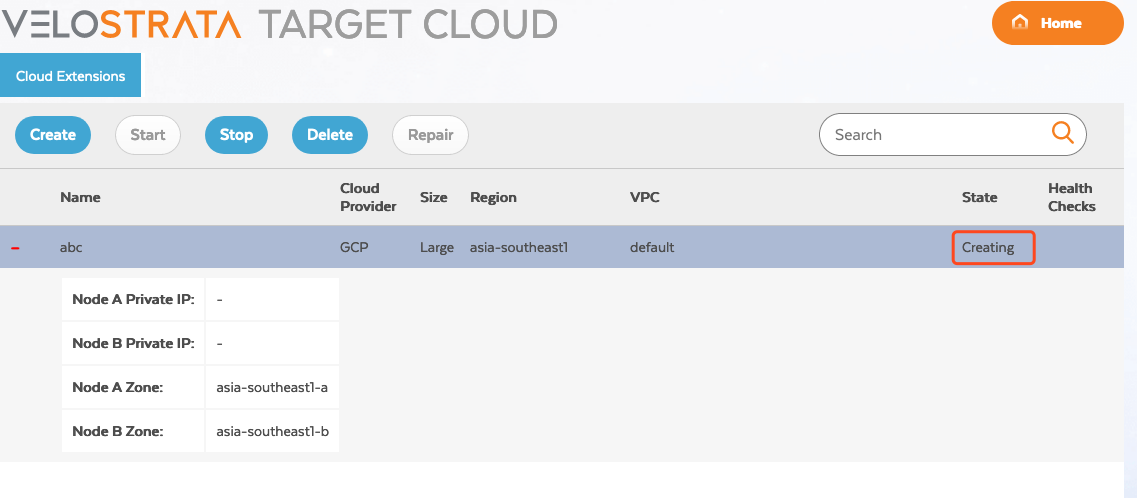
创建好后,有相应的 IP 地址:
3 创建迁移任务:
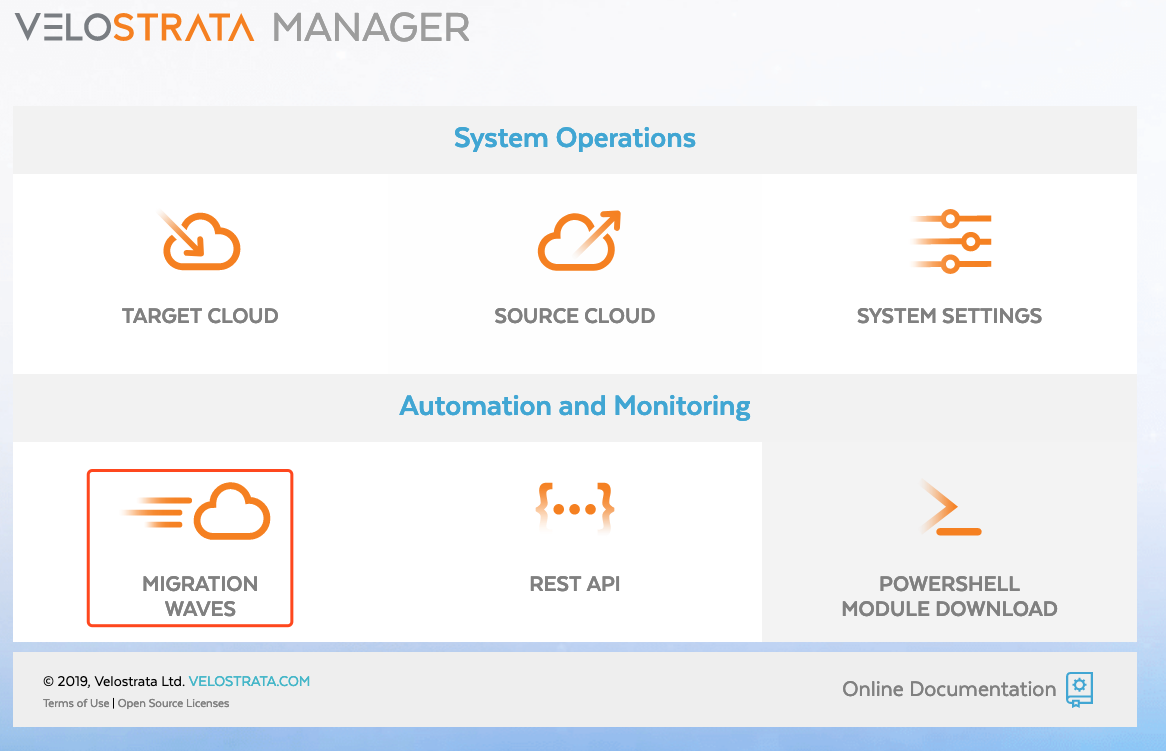
A 创建 Runbook
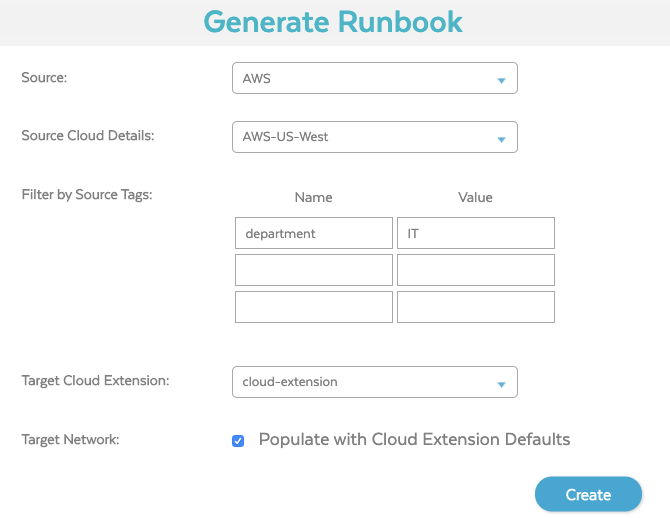
填写相应的信息,其中 AWS 的 Tag 是必须要填写的:
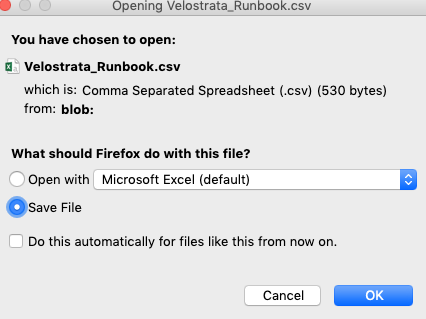
点击 Create,会保存一个 CSV 文件:
编辑这个文件:

修改 RunGroup, GcpProject, TargetInstanceType 比如:
1.RunGroup: 1
2.GcpProject: hengwei-project01
3.TargetInstanceType: n1-standard-2
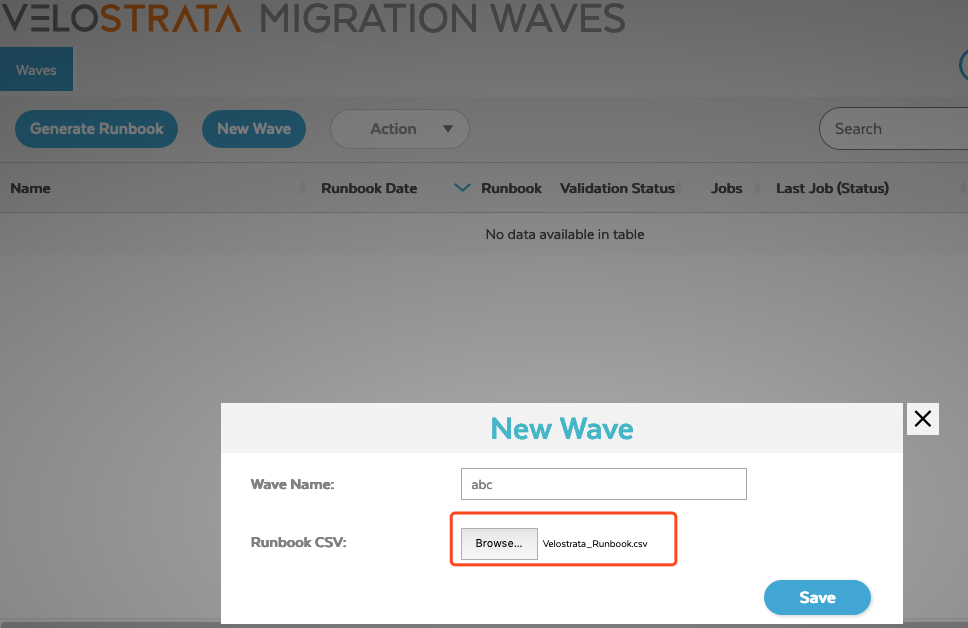
B 创建 New Wave
创建 New Wave,选择刚才修改的文件:
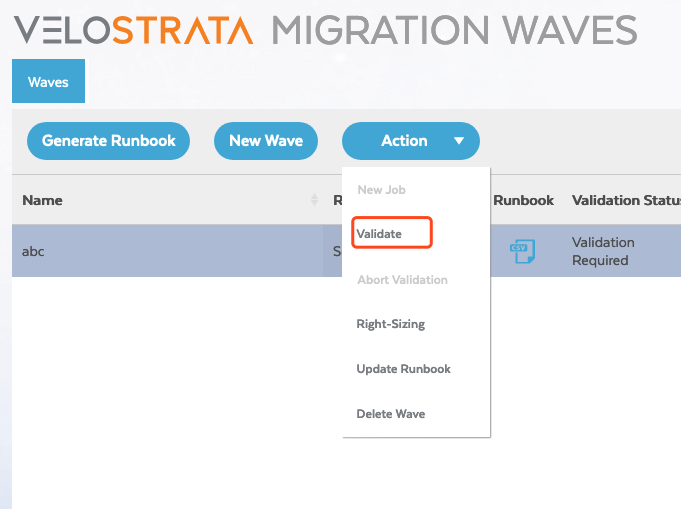
Save 后,高亮这个 wave,选择 Action 中的 validate,系统开始 Validate:

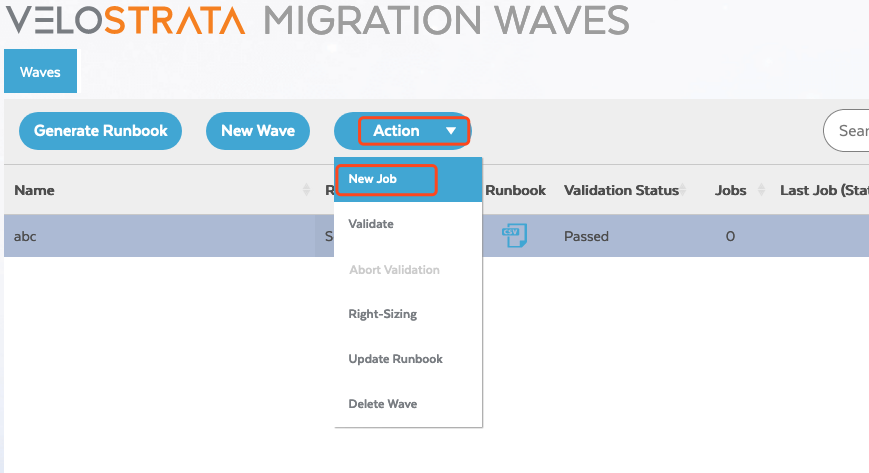
Pass 后,再点击 Action,选择 New Job:
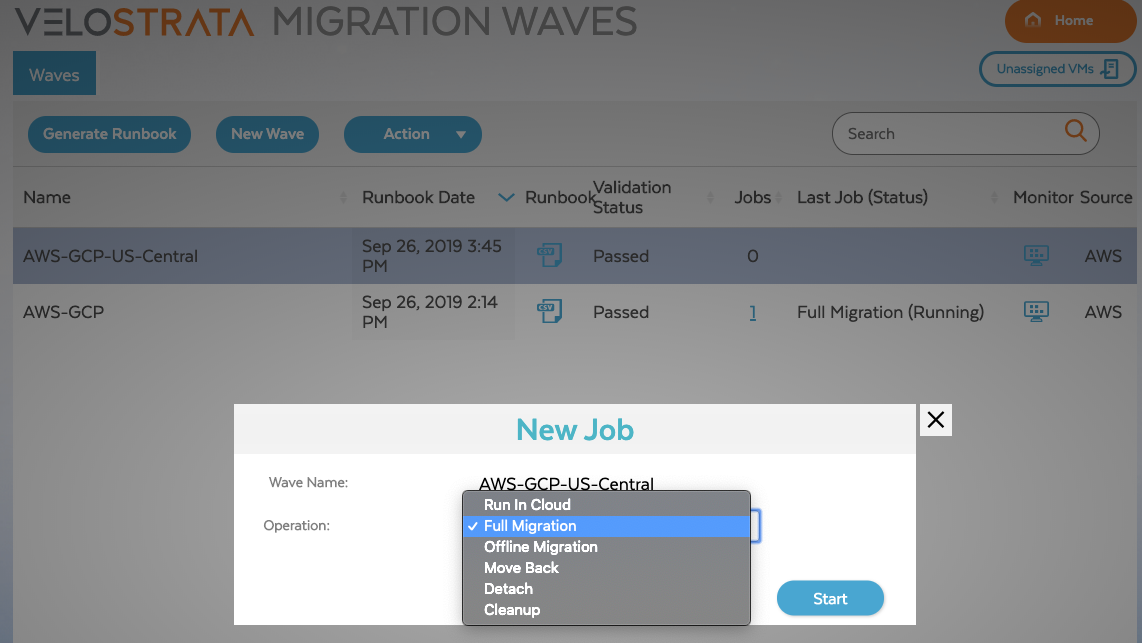
根据需要选择相应的迁移模式, 这里选择 Full Migration:
迁移过程,可以看到状态:


C 迁移成功后 Detach VM


D Cleanup the VMs


五 总结
用 Velostrata 可以方便的把其他云的 VM 迁移到 GCP 的 GCE 上。
文章版权归作者所有,未经允许不得转载


评论